How to Cut Fiberglass: Professional Tools and Techniques for Perfect Results

02 April 2026
To cut fiberglass cleanly, match the tool to the material: dry cloth and stitched fabrics want a carbide-insert powered cutter (or sharp shears or a rotary cutter on light cloth), and cured laminate needs a thin composite disc on an angle grinder, a fine-tooth jigsaw blade or an oscillating tool. Then hold the fabric still, follow the thread line, and seal any edge that will sit before it gets laminated.
Most bad layups we see go wrong at the cutting table. A ragged edge on woven cloth shows through the wet laminate, leaves resin-starved voids along the boundary and costs you material when you trim the mess back. Below is how we handle dry reinforcements, cured panels and everything between, with the tool we pick for each one.
Cutting essentials
-

Raven Nitrile Gloves 7mil - 100 Pack
Regular price $19.95 USDSale price $19.95 USD Regular priceUnit price per$14.95 USD -

3M Easi-Case Paint Spray Respirator
Regular price $49.95 USDSale price $49.95 USD Regular priceUnit price per -

1708 Biaxial Fiberglass
Regular price From $12.95 USDSale price From $12.95 USD Regular priceUnit price $12.95 per yd -

6oz Fiberglass E Cloth
Regular price From $10.95 USDSale price From $10.95 USD Regular priceUnit price $10.95 per yd


Quick reference: how to cut fiberglass, best tool by material
| What you are cutting | Tool | Know before you cut |
|---|---|---|
| Woven cloth to about 12 oz | Battery-powered cutter with carbide inserts | Crisp edge, weave stays locked |
| 1708 biaxial, woven roving, stacked layers | Heavy-duty rechargeable cutter | Stack up to 4 to 6 layers |
| Woven cloth to about 6 oz, straight cuts | Rotary cutter with a metal straightedge | New blade every 10 to 15 linear feet |
| Light to mid-weight cloth, short runs | Dedicated fiberglass shears | Hand fatigue on longer sessions |
| Thin woven glass, detail and short cuts | Hot knife | Fuses the edge, slow on long cuts |
| Chopped strand mat, short straight sections | Tear by hand along a metal straightedge | Less airborne fiber than a powered cut |
| Cured laminate, straight cuts | Angle grinder with thin composite disc | Fastest option in cured panels |
| Cured laminate, curves | Jigsaw with fine-tooth blade | Wear a respirator, not a dust mask |
| Cured laminate, tight interior cuts | Oscillating tool | Reaches where a grinder cannot |
Start With What You Are Cutting
No single cutting method works on every fiberglass product. Pick the wrong one and the material fights you from the first inch.
Woven cloth: plain weave and twill
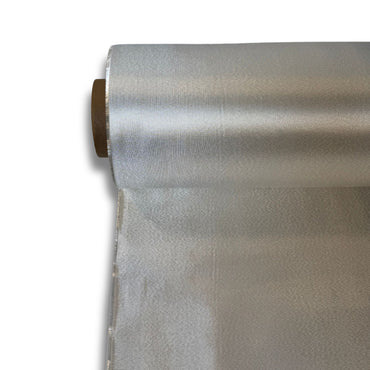
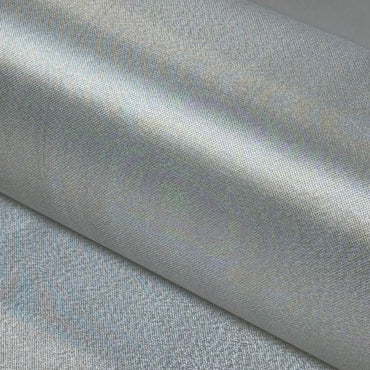
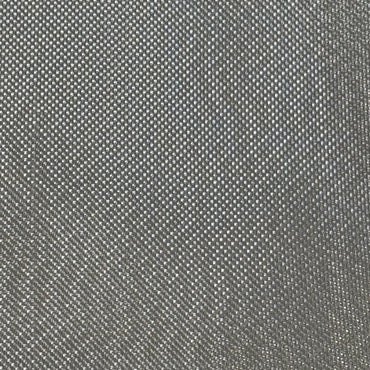
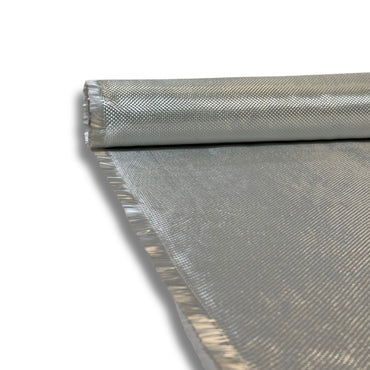
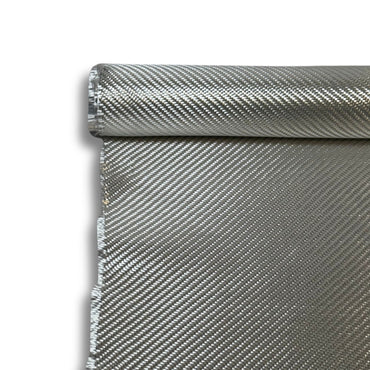
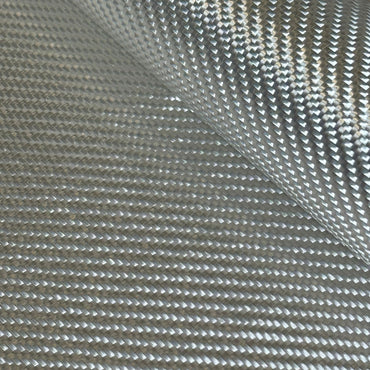
Plain weave and twill cloth in 4 oz, 6 oz or 10 oz are built from interlaced threads. Wander off a thread line and the weave starts running right away, so the tool has to either seal the edge as it goes or shear so cleanly that the threads never get a chance to shift. Lighter cloth is the least forgiving: put a dull or mismatched blade on it and it frays worst of all. Our fiberglass cloth weight chart shows where each weight sits.
Stitched biaxial and multiaxial fabrics
1708 biaxial and the other multiaxial fabrics are stitched together instead of woven, so each ply holds its shape better under the blade. They are also heavy (1708 runs 17 oz per square yard), which means more drag and quicker blade wear if you cut by hand. Stacked biaxial is the job where a powered cutter earns back what it cost the first time you use it.
Chopped strand mat (CSM)
CSM has no weave to unravel because its fibers lie in random directions, so it is the easiest dry material to cut. For short runs you can simply tear it against a straightedge. The catch is dust: go at it with anything abrasive and you put a cloud of loose fiber in the air, which is a breathing hazard.
Cured laminate
Once glass is wet out and fully cured it becomes a hard, abrasive composite that chews up ordinary blades. You need carbide or diamond tooling: a thin composite disc in an angle grinder, a fine-tooth blade in a jigsaw, or an oscillating tool. Each of them throws fine silica dust, so wear a respirator (a dust mask is not enough) and keep eye protection on for the whole job.
Picking the Cutter: Options by Material and Volume
This is how each option stacks up, starting with the one we reach for most on dry fabric.
Battery-powered fiberglass cutters: first pick for dry fabric
If you cut cloth every week, a powered cutter built for reinforcement fabric is the biggest single upgrade you can make. Above 4 oz woven cloth, scissors and rotary cutters tear more than they cut, and the edge comes out ragged. Once you are into 17 oz biaxial or stacks of 10 oz cloth, hand tools cost you time and edge quality on every piece.
Our WBT battery-powered cutter uses carbide inserts, not plain steel blades. The carbide shears glass, carbon and aramid fiber outright, where steel tends to push the threads sideways as it drags. You get a sharp edge with the weave still locked. It runs on one battery and is sized for light to mid-weight fabric, roughly 12 oz woven cloth at the top end.
Heavier work calls for the WBT2 heavy-duty rechargeable cutter: 1708 biaxial, woven roving, thick mat, or stacks that mix fabric types. It comes with two rechargeable batteries, so one can charge while you keep cutting. The extra power pushes through dense fabric without stalling or cooking the blade, and that counts when you are cutting a whole project layout in one sitting.
Both models handle carbon fiber and aramid (Kevlar) along with standard E-glass, which helps when one layup mixes fabrics.
Hot knife
A hot knife heats its blade electrically, so it cuts and fuses the edge in one pass. It suits lighter synthetic fabrics and thin woven glass. It is slow on long runs and takes a steady hand to hold a straight line, so keep it for detail work and short cuts rather than laying out a full roll.
Rotary cutter and metal straightedge
On a self-healing mat with a metal ruler as a guide, a sharp rotary cutter handles straight cuts in woven cloth to about 6 oz. Glass fiber dulls the blade sooner than most people expect. On anything heavier than 4 oz cloth, plan on a fresh blade every 10 to 15 linear feet.
Fiberglass shears
Dedicated fiberglass shears beat household scissors and will handle light to mid-weight cloth on short runs. Over a long session your hand tires, and the edge gets uneven as the blades lose their bite. Keep one pair for glass and nothing else, since other materials wear them down faster. Our 12 in serrated fiberglass and carbon scissors fill that role.
Angle grinder, jigsaw, oscillating tool: cured panels only
These three are for hardened composite: trimming cured layups, cutting openings in existing glass structure and similar work. A thin composite or fiberglass cutting disc in an angle grinder is the quickest way through a straight cut. A jigsaw with a fine-tooth blade follows curves. The oscillating tool gets into tight interior cuts that the grinder cannot reach. On cured glass, all three call for full respiratory protection and eye protection.
Cutting Dry Cloth, Step by Step
The prep stays the same no matter which cutter is in your hand.
1. Plan every piece before you cut
Know exactly what you need before the roll comes out. Run the resin calculator against your fabric layout so the resin numbers and the cut list get settled together, then cut every piece before any resin is mixed. Draw the dimensions on a cutting diagram instead of marking up the roll itself.
2. Pin the fabric down
Use a big, clean, flat table. Loose cloth creeps under the blade, so set weights on the corners and down the line, or tape it to the table for long straight runs. Any shift mid-cut leaves a wavy edge, and that is tough to fix later.
3. Follow the threads
With woven cloth, cut along a thread line whenever the shape of the piece lets you. Running with a thread instead of slicing diagonally through several keeps the neighboring threads locked in their interlace and cuts fraying way down. Stitched biaxial and multiaxial fabrics are less sensitive to this, but it is still the better habit.
4. Keep the cut moving
On a powered cutter, begin at one end, hold an even pace and try not to stop partway. With shears, close the full length of the blade on each stroke instead of nibbling with the tips. Short strokes leave a jagged edge and wear the blades faster.
5. Seal edges that will sit
If a cut edge of woven cloth will be left exposed, or will wait more than an hour or two before it is laminated, brush a thin coat of catalyzed resin down the cut line as soon as you finish. That pins the threads where they are. For an edge that is structural and exposed, or that shows in the finished part, cover the laminated edge with a strip of surfacing veil, which leaves the smoothest finish you can get.
Safety Gear for Cutting Glass
Glass fiber is a mechanical irritant, not a chemical poison the way resin vapor is, but it will still cause you real trouble if you shrug it off.
- Respirator: a half-face respirator fitted with P100 particulate filters when cutting dry fabric by hand or with a powered cutter, and that same setup as the bare minimum once power tools go into cured laminate. A single-layer paper dust mask is not enough for either job.
- Eyes: safety glasses with side shields, because loose filaments are stiff, short and light, and they float at eye level. Add a full face shield when an angle grinder is going into cured laminate.
- Skin: the itch from loose fibers can last hours. Cover your arms with long sleeves and put on 7 mil nitrile gloves, which are thick enough that fiber ends do not poke through. Rinse exposed skin with cold water when you finish; hot water opens the pores and drives fibers in deeper.
- Air: cut outdoors or somewhere with moving air. For long indoor sessions on cured laminate, set up local exhaust aimed at the cut line before you start.
Shop Habits That Save Cloth and Time
Make templates. For compound curves, or any shape you will cut more than once, build a rigid template from cardboard or thin plywood, trace it onto the fabric, then cut on the line. Matching pieces give you matching overlaps and a laminate thickness you can predict.
Cut in stacks. When the schedule calls for several identical pieces, layer one fabric 4 to 6 plies deep at most and run the powered cutter through the whole stack at once. The WBT2 handles stacked cloth without trouble, and on a multi-layer schedule this can cut layout time in half or better.
Mark with tape. A fabric marker on light cloth can wick into nearby threads and show through clear resin. Lay 3M 233 masking tape down the line instead: it gives you a sharp guide, keeps ink off the fabric beside the cut, and peels off clean afterward.
Bias cuts. Some parts need cloth cut at 45 degrees to the weave, because bias-cut cloth drapes over compound curves that on-axis cloth refuses to follow. Use the powered cutter and go slow. Bias cuts fray more than any other cut, since the blade crosses threads running in both directions at once.
Fixing Common Cutting Problems
Frayed woven edges. Nearly always a dull blade or the wrong tool. Dull shears will do it, and so will a rotary blade that has already done its 10 to 15 feet. The WBT cutter leaves edges clean enough that they need no cleanup after the cut.
Wavy lines. The fabric shifted while you cut. Pin it down again before the next pass, with weights or tape along the whole length of the line instead of only at each end.
Threads pulling out of biaxial. The tool is dragging instead of shearing. Heavy fabric needs enough power to go through in one clean pass, and the WBT2 has the torque to cut stacked biaxial without bogging down into a drag.
Too much dust from mat. CSM sheds loose fiber freely. Cut outside or hold a vacuum near the line, and wear the respirator even for a quick cut. For short straight pieces, tearing the mat by hand against a metal straightedge puts less fiber in the air than any powered cut.
Frequently asked questions
What is the best tool to cut fiberglass cloth without fraying?
A battery-powered fiberglass cutter with carbide inserts is the best option for dry cloth, carbon fiber and aramid. The carbide shears the fiber cleanly instead of dragging through it, so the weave stays locked at the cut edge. The WBT Battery Powered Fiberglass Cutter handles light to mid-weight fabrics up to about 12 oz. For heavy fabrics, stacked layers or extended sessions, step up to the WBT2 Heavy Duty Rechargeable Fiberglass Cutter, which ships with two batteries.
Why do my fiberglass cloth edges keep fraying when I cut them?
Frayed edges come from a dull blade, the wrong tool for the fabric weight, or cutting diagonally across the weave when you could cut along it. Sharpen or replace your blade first. If fraying persists, switch to a carbide-insert powered cutter that shears cleanly in a single pass. Cutting along a thread line rather than across threads on woven cloth makes a significant difference in edge quality even with manual tools.
Do I need a respirator when cutting cured fiberglass?
Yes, and a proper one. Cutting cured laminate with an angle grinder or jigsaw generates fine silica-containing dust that a paper dust mask does not filter adequately. Use a half-face respirator with P100 particulate filters as the minimum. Add safety glasses or a full face shield, wear long sleeves and gloves against fiber splinters, and work outdoors or with local exhaust ventilation directed at the cut line.
How should I seal cut fiberglass edges that will be exposed?
Brush a thin coat of catalyzed resin onto the cut edge immediately after cutting to lock the threads in place and prevent moisture from wicking into the laminate. For exposed structural or cosmetic edges in the finished part, lay a strip of surfacing veil over the laminated edge and wet it out with resin. This produces the smoothest possible surface and closes any exposed fiber ends completely.
What is the cleanest way to cut multiple identical fiberglass pieces?
Two approaches work together. First, make a rigid cardboard or thin plywood template for any repeated shape so every piece is identical and overlaps stay consistent in the layup. Second, stack up to 4 to 6 layers of the same fabric and cut them together with the WBT2 Heavy Duty Rechargeable Fiberglass Cutter, which has enough torque to handle stacked fabric cleanly. Both approaches cut layout time significantly versus marking and cutting each piece individually.
Can I cut carbon fiber and Kevlar with the same cutter I use for fiberglass cloth?
Yes, if the cutter uses carbide inserts. Both the WBT and WBT2 fiberglass cutters are rated for carbon fiber and aramid (Kevlar) as well as standard E-glass. Plain steel blades struggle with carbon fiber in particular, dulling quickly and producing frayed edges. Carbide maintains its edge long enough to cut carbon cleanly across a full project session. Aramid is the hardest of the three to cut; the WBT2 with its additional power handles it more reliably.
What You Need For This Job
- 1708 Biaxial Fiberglass: 17 oz stitched biaxial, typical of the heavy fabrics where a powered cutter matters most
- WBT Battery Powered Fiberglass Cutter: one-battery carbide cutter that takes woven glass to roughly 12 oz, plus carbon and aramid
- WBT2 Heavy Duty Rechargeable Fiberglass Cutter: two-battery cutter for biaxial, woven roving, stacked layers and long sessions
- Surfacing veil: laid over laminated cut edges to close off fiber ends and leave the smoothest finish
- Raven Nitrile Gloves 7mil - 100 Pack: keeps fiber splinters and resin off your hands
- 3M Easi-Case Paint Spray Respirator: breathing protection while you cut, a must on cured laminate
Shop the materials from this article
Prev post

Breather Cloth Vacuum Bagging: Essential Guide to Perfect Composite Layups
Updated on 03 April 2026
Next post

What Is Coremat and How to Use It in Composite Layups
Updated on 02 April 2026