Breather Cloth Vacuum Bagging: Essential Guide to Perfect Composite Layups

03 April 2026
In vacuum bagging, the breather cloth is the component most fabricators underestimate until something goes wrong. You pull vacuum, the gauge reads 25 inHg, and the part comes out with dry spots, resin puddles, or uneven consolidation. Nine times out of ten, the breather is the culprit: wrong weight, insufficient coverage, or simply missing from the stack. This guide settles the decision so you can buy the right material and bag it correctly the first time.
Primary keyword note for this guide: throughout this article, "breather cloth" and "vacuum bag breather" are used as the consistent SEO target. The weight comparison phrase "4oz vs 7oz breather cloth" clusters in the comparison section and meta description, where it belongs.
What Breather Cloth Actually Does Under the Bag
Breather cloth is a porous non-woven material that sits between your release film and the bagging film during the vacuum bagging process. It does two jobs simultaneously, and both matter.
A note on terminology. In some composite literature, "bleeder cloth" and "breather cloth" are used for functionally distinct materials: bleeder absorbs excess resin and sits directly against the laminate or peel ply, while breather maintains the air channel and sits above the bleeder. In practice, and in this catalog, the two functions are combined into a single non-woven material that does both. When you order breather cloth from this store, you are getting one material that absorbs resin bleed and keeps the air path open. You do not need a separate bleeder layer unless your process engineer has specified one for a prepreg or autoclave schedule.
Job one: keep the vacuum path open. Without breather cloth, the bagging film seals directly against the laminate surface the moment vacuum is applied. The pump reads full vacuum at the port, but air and volatiles from the rest of the part have nowhere to go. Pressure at the port does not equal pressure across the whole laminate. The breather cloth holds the film off the surface so air has a continuous channel from every corner of the part to the vacuum port.
Job two: absorb excess resin. As vacuum pressure consolidates the laminate, resin is squeezed out. If it has nowhere to go, it pools at the edges or creates resin-rich layers that add weight without adding strength. The breather absorbs that surplus resin, giving you a leaner, more consistent fiber-to-resin ratio across the part.
Skip the breather and you are not really vacuum bagging. You are trapping the laminate in a sealed bag with a vacuum gauge that lies to you.
Choosing the Right Weight: 4oz vs 7oz Breather Cloth
Weight determines how much air channel the breather maintains and how much resin it can absorb before it saturates and closes off. Get this wrong in either direction and you get a failed bag. The table below gives you the numbers to make the call before you cut material.
| Property | 4oz Breather Cloth | 7oz Breather Cloth |
|---|---|---|
| Weight | 4 oz/yd2 | 7 oz/yd2 |
| Width | 60 inches | 60 inches |
| Approx. resin absorption capacity | 3 to 4 oz resin/ft2 before saturation | 5 to 7 oz resin/ft2 before saturation |
| Typical ply-count range | 2 to 6 plies | 7 plies and above |
| Recommended resin systems | Epoxy infusion, controlled epoxy wet layup, carbon fiber schedules | Polyester and vinyl ester wet layup, resin-rich schedules, thick structural builds |
| Best for | Hull patches, deck repairs, infusion panels, thin to medium laminates | Heavy bleed structural parts, complex curves with long hold times, large one-shot bags |
4oz Breather Cloth: The Standard Choice
The 4oz Breather Cloth is the default for the majority of marine vacuum bagging work. At 60 inches wide, a single piece covers most hull repair sections and full deck panels without seams. It handles standard resin bleed volumes without saturating, keeps the air path open throughout the cure cycle, and is light enough not to add unnecessary bulk to the bag stack.
For most marine vacuum bagging jobs, start with the 4oz Breather Cloth. It covers standard fiberglass repairs, epoxy and carbon layups, and infusion setups without overbuilding your stack. If your job fits the profile below, this is the roll to put in the cart.
Use 4oz breather for:
- Standard fiberglass repairs and laminate patches
- Carbon fiber layups with controlled resin-to-fiber ratios (typically 35 to 45% resin by weight)
- Infusion setups where resin volume is metered and bleed is minimal
- Thin to medium laminate schedules (2 to 6 plies)
- General vacuum bagging where you are not running unusually wet layups
Estimating Resin Bleed Volume Before You Choose
The post tells you to match breather weight to bleed volume. Here is how to estimate bleed volume without a spreadsheet.
A standard wet layup using polyester or vinyl ester resin typically loads roughly 1.5 to 2.5 oz of resin per ply per square foot of laminate, depending on how wet the operator runs the brush. A controlled epoxy wet layup runs closer to 0.8 to 1.2 oz per ply per square foot. An infusion schedule delivers even less to the breather because the resin volume is metered by the infusion setup itself, usually under 0.5 oz bleed per ply per square foot reaching the breather layer.
Quick field rule: multiply your ply count by your laminate area in square feet, then multiply by the resin-per-ply figure for your system. Compare that total to the absorption capacity in the table above.
Example: a 4-ply polyester patch covering 2 sq ft at 2 oz per ply per sq ft produces roughly 16 oz of potential bleed. Spread over 2 sq ft of breather, that is 8 oz/ft2, which exceeds the 4oz breather capacity (3 to 4 oz/ft2) and lands squarely in 7oz territory. The same 4-ply patch in epoxy infusion at 0.5 oz per ply per sq ft produces roughly 4 oz total bleed across 2 sq ft (2 oz/ft2), well within the 4oz breather range.
If you want a more precise figure for your laminate schedule, use the resin calculator to estimate total resin by area and ply count, then apply the bleed fractions above for your resin system.
7oz Breather Cloth: For High-Resin and Complex Work
The 7oz Breather Cloth carries significantly more absorption capacity per square yard. When a lightweight breather saturates mid-cure, it stops pulling air and stops absorbing resin at the same time. The vacuum gauge still reads fine. The part does not.
Step up to 7oz for:
- Thick laminate schedules of 7 or more plies where bleed volume is high
- Resin-rich wet layups, especially polyester and vinyl ester systems that run wetter than epoxy
- Complex curved surfaces where the bag has long hold times and the breather needs to stay open through full cure
- Large structural parts where you cannot afford a failed bag mid-cure
- Any job where a second bagging run would be unacceptable
The decision rule: run the bleed estimate above, compare to the table, and match. Lightweight breather on a heavy bleed job will saturate. Heavy breather on a light bleed job will pull too much resin and starve the laminate. Neither is recoverable once the bag is sealed.
Products used in this guide
-

Vacuum Bagging Starter Kit - Film, Peel Ply, Breather, Tape, Connector & Hose
Regular price $174.95 USDSale price $174.95 USD Regular priceUnit price per -

4oz Breather Cloth
Regular price From $7.95 USDSale price From $7.95 USD Regular priceUnit price $7.95 per yd -
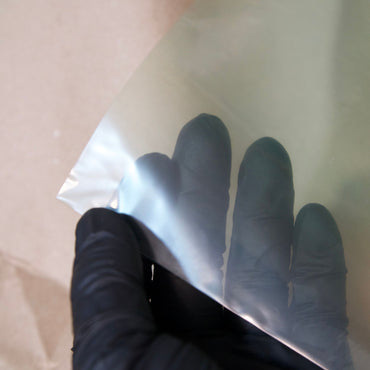
Nylon Bagging Film
Regular price From $9.95 USDSale price From $9.95 USD Regular priceUnit price $9.95 per yd -

Vacuum Bagging Sealant Tape - 25 ft Rolls
Regular price From $11.95 USDSale price From $11.95 USD Regular priceUnit price $11.95 per 25ft


Where Breather Cloth Sits in the Stack
The correct vacuum bag stack from laminate surface outward is:
- Mold or repair surface (with mold release applied)
- Laminate (fiberglass, carbon, core, or combination)
- Peel ply (optional, gives a clean bondable surface after cure)
- Perforated release film (controls how much resin bleeds through)
- Breather cloth (covers the full part plus 2 to 3 inches beyond every edge)
- Vacuum bagging film sealed with sealant tape
- Vacuum port positioned on the breather layer
The vacuum port must contact the breather cloth directly, not the release film or laminate. The breather is the distribution layer that feeds air to the port from across the entire part. If the port bypasses the breather, you pull vacuum only from the area immediately around the fitting.
Step-by-Step Application
1. Prepare the Laminate Stack
Complete your laminate stack including any core material, peel ply, and perforated release film before cutting your breather. Measure the full footprint of the laminate including any raised or contoured areas.
2. Cut Breather Oversized
Cut the breather cloth at least 2 to 3 inches beyond every edge of the laminate. On complex shapes with inside corners, cut relief slits so the cloth lies flat without bridging. Bridging creates an air gap under the breather that disrupts uniform pressure, so get it flat against the surface all the way to the edges.
3. Position Without Wrinkles
Lay the breather over the release film smoothly. Any fold or wrinkle that compresses and seals off a section of breather creates a dead zone, an area where air cannot evacuate and resin pools. Work from the center outward to push folds toward the edges where they matter less.
4. Place the Vacuum Port on the Breather
Set your vacuum port at or near the highest point of the part, directly on top of the breather cloth. Do not cut a hole in the breather to route the port through to the laminate. The breather feeds the port; the port does not bypass it.
5. Seal the Bag and Pull Vacuum
Install the bagging film over the entire stack and seal with sealant tape, working out air pockets in the tape seal before connecting the pump. Pull vacuum slowly at first to allow the bag to conform to the part shape without tearing the breather or displacing fibers.
Target vacuum level depends on your resin system and should not be treated as a single universal number:
- Epoxy infusion: typically 25 to 29 inHg, held as close to full vacuum as the infusion setup allows, because the resin flow is driven by the vacuum differential
- Epoxy wet layup: 20 to 25 inHg is standard; full vacuum risks pulling too much resin through a light perforation pattern
- Polyester and vinyl ester wet layup: 15 to 22 inHg is typical; these systems off-gas styrene under high vacuum and can blister if pulled too hard, especially with thicker laminates
- Prepreg (oven cure, no autoclave): full vacuum (26 to 29 inHg) is standard; the resin content is already controlled by the prepreg manufacturer
Hold your target level, verify the gauge stabilizes, and monitor for at least the first 30 minutes of cure. A gauge that drops without a pump cycling off indicates a leak, not a bagging success.
The Mistakes That Ruin Bags
Stopping Short of the Edges
This is the single most common error. Breather cloth that ends at the laminate edge leaves the perimeter without an air path. Air from the center of the part has to travel the full distance to find an edge that connects to the port, and in a wet laminate it may not make it before resin closes the pathway. Always extend 2 to 3 inches past every edge, no exceptions.
Saturated Breather From the Wrong Weight
A saturated breather looks fine on the outside of the bag. The gauge holds vacuum because the bag is sealed. But internally the breather has turned into a wet mat that blocks both air and further resin movement. If you pull a part and find resin-rich zones or dry spots that do not correspond to your layup geometry, a saturated breather is the most likely cause. Upgrade to 7oz for that application.
Contaminated Breather Cloth
Breather cloth picks up dust, sanding debris, and resin mist quickly. Any contamination on the surface of the breather that contacts your peel ply or release film can transfer to the laminate surface. Handle breather rolls with clean nitrile gloves, store them in sealed plastic bags in a dry location, and cut fresh material from the interior of the roll if the outer layers have been exposed. In a humid shop or marine environment, add desiccant packets to your storage bags to prevent moisture absorption that degrades absorption performance.
Bridging on Complex Geometry
On parts with inside corners or sharp contours, unsupported breather cloth bridges across geometry rather than conforming to it. That bridge creates a pressurized air pocket under the bag film that shows up as a resin-rich raised area on the cured part. Score or dart the breather at inside corners so it lies flat, the same technique used with carbon fiber layups on complex molds.
Storage and Shelf Life
Breather cloth has no resin to expire, but its performance degrades with moisture and contamination. Store rolls vertically or horizontally on a clean shelf in a cool, dry location. Keep opened rolls in sealed plastic bags. Moisture-loaded breather cloth absorbs less resin because the fibers are already carrying water weight, which reduces the available void space for resin uptake. The heavier your breather, the more absolute absorption capacity you lose to moisture, but any significant moisture loading will push effective capacity below the rated weight. In a working boatyard environment, treat breather cloth like a consumable: buy what you need for the job, store it clean, and do not reuse material that has been left out in humid air for more than a few days.
Frequently Asked Questions
What does breather cloth actually do in a vacuum bag layup?
Breather cloth is a porous non-woven fabric that does two jobs simultaneously. It maintains an open air channel so the pump can evacuate air from every part of the laminate, not just the area around the port, ensuring full consolidation and uniform pressure. It also absorbs excess resin squeezed out under vacuum so resin cannot pool and create resin-rich zones. Without breather cloth, the bagging film seals against the laminate and the gauge reads vacuum while the interior of the part is not being pulled at all.
Should I use 4oz or 7oz breather cloth for my project?
The 4oz Breather Cloth is the right choice for standard fiberglass repairs, controlled-ratio epoxy and carbon layups, and infusion setups where resin volume is metered. Its 60-inch width handles large hull and deck sections without seams. Step up to the 7oz Breather Cloth for thick laminate schedules of 7 or more plies, resin-rich polyester or vinyl ester wetouts, and complex parts with long vacuum hold times where saturation mid-cure is a real risk. Use the bleed volume estimate in the weight-selection section above to confirm your choice before cutting material.
What happens if the breather cloth saturates during the cure?
A saturated breather becomes a solid wet mat that blocks both air movement and further resin bleed. The vacuum gauge continues to read correctly because the bag seal is intact, but pressure is no longer being distributed across the laminate. The result is resin-rich zones, dry spots, and uneven fiber consolidation. The part looks bagged but was not effectively bagged for the duration of the cure. The correct fix is to upgrade to the heavier weight for that application, not to double-layer the same weight. Double-layering two sheets of 4oz does not give you the same open fiber structure as a single 7oz sheet, adds draw-down time, and can restrict air flow at the interface between the two layers. If your bleed estimate puts you above the 4oz capacity range, buy the 7oz Breather Cloth.
How far past the laminate edges should breather cloth extend?
Extend the breather cloth at least 2 to 3 inches beyond every edge of the laminate, lay it completely flat with no wrinkles, and make sure it contacts the vacuum port directly. Stopping the breather at the laminate edge leaves the perimeter without an air evacuation path. Dead zones at the edges are one of the most common causes of edge delamination and resin pooling in vacuum bagged marine parts. When in doubt, cut generously and trim later.
Can I reuse breather cloth between jobs?
Reusing breather cloth is not recommended for structural marine work. Once the cloth has absorbed resin it becomes partially blocked, and you cannot reliably assess how much capacity remains. Resin-contaminated breather can also transfer surface contamination to peel ply or release film in a subsequent layup. Treat breather as a single-use consumable. The cost per yard of 4oz breather cloth is low relative to the cost of a failed laminate.
Where does the vacuum port connect in relation to the breather cloth?
The vacuum port must sit on top of the breather cloth, between the breather and the bagging film. The breather distributes air from across the entire part to the port. If you route the port through the breather directly to the laminate or release film, you are pulling vacuum only from the immediate area around the fitting. The rest of the part is effectively isolated. Always position the port at or near the highest point of the part so gravity assists resin bleed away from the port location.
Is breather cloth the same as bleeder cloth?
In some process specifications these are distinct layers: bleeder cloth absorbs excess resin and sits directly against the laminate, while breather cloth sits above it and maintains the air channel. In standard marine shop practice, and in this catalog, a single non-woven material performs both functions. When you order breather cloth here, you get one layer that absorbs resin bleed and keeps the vacuum path open. A separate dedicated bleeder layer is only needed for prepreg or autoclave schedules where the process engineer has specified a split stack.
What You Need For This Job
- 4oz Breather Cloth: standard vacuum bag breather for most marine fiberglass and epoxy work, 60 inches wide, handles 2 to 6 ply schedules and controlled resin volumes
- 7oz Breather Cloth: heavy bleed absorption for thick laminates, polyester and vinyl ester wet layups, and complex parts with long cure times
- Perforated Release Film: sits between peel ply and breather cloth, controls how much resin bleeds through to the breather layer
- Peel Ply: optional layer directly on the laminate surface, peels off after cure to leave a clean, bondable texture without sanding
- Nylon Bagging Film: outer vacuum bag layer that seals the full stack
- Vacuum Bag Sealant Tape: airtight perimeter seal for the bagging film
Shop the materials in this guide
Prev post

Vacuum Bagging Film: Complete Setup Guide for Perfect Composite Results
Updated on 03 April 2026
Next post

How to Cut Fiberglass: Professional Tools and Techniques for Perfect Results
Updated on 02 April 2026