How to Fiberglass Over Plywood: Complete Step-by-Step Guide

23 February 2026
Fiberglassing over plywood is one of the most common projects in boat building and repair. Whether you're rebuilding a boat floor, replacing a transom, or waterproofing a deck, the process is straightforward once you understand the basics.
This guide covers everything you need to know: materials, surface prep, layup technique, and the mistakes that sink most DIY projects.
Why Fiberglass Over Plywood?
Plywood provides structure and stiffness, but it's vulnerable to water damage. Fiberglass creates a waterproof, impact-resistant shell that protects the wood while adding strength. This combination is the backbone of most fiberglass boat construction.
Common applications include:
- Boat floor replacement
- Transom rebuilds
- Deck overlays
- Hatch covers and compartments
- Custom marine furniture
Materials You'll Need
Plywood
Use marine-grade plywood (BS 1088 or equivalent) for any below-waterline or high-moisture application. Marine plywood uses waterproof glue and void-free veneers that won't delaminate when exposed to water.
For less critical applications, exterior-grade plywood can work, but expect shorter lifespan in wet environments.
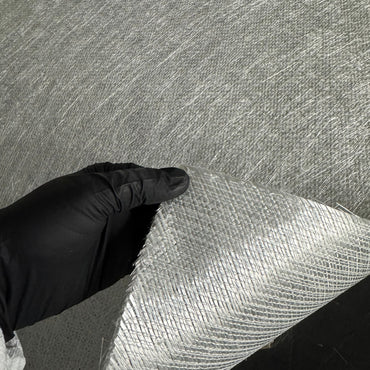
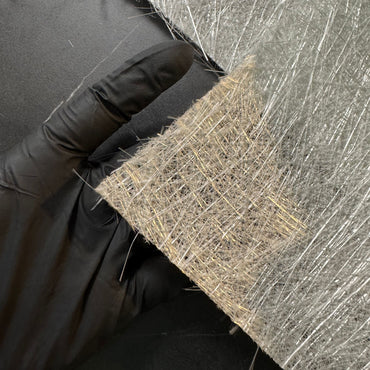
Fiberglass Fabric
You have two main options:
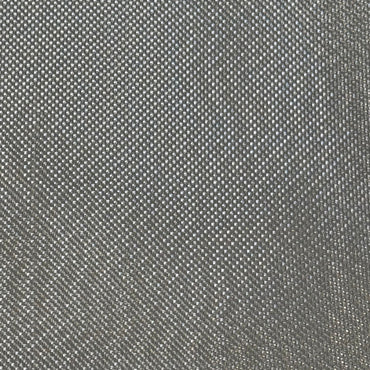
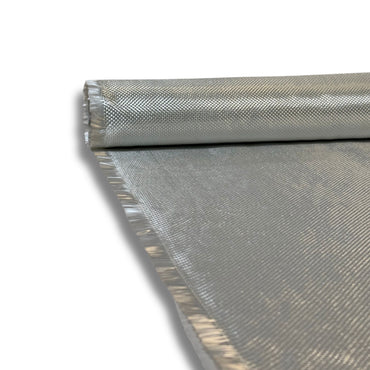
- Fiberglass Cloth – Woven fabric with smooth finish. Best for visible surfaces and epoxy layups. Available in various weights from 4 oz to 10 oz.
- Chopped Strand Mat (CSM) – Random fiber mat that builds thickness quickly. Best for polyester/vinyl ester resin and hidden structural layers.
For most plywood projects, 6 oz or 10 oz fiberglass cloth works well with epoxy. If using polyester resin, 1.5 oz CSM is the standard choice.
Resin
Your resin choice matters more than you might think:
| Resin Type | Pros | Cons | Best For |
|---|---|---|---|
| Epoxy | Best adhesion to wood, waterproof, no shrinkage | Higher cost, UV sensitive | Marine plywood, structural bonds |
| Polyester | Low cost, fast cure | Shrinks, weaker wood bond | Non-structural, budget projects |
| Vinyl Ester | Good water resistance, stronger than polyester | Moderate cost, still shrinks | Below waterline, osmosis repair |
Recommendation: For fiberglassing plywood, epoxy resin is almost always the best choice. It bonds chemically to wood fibers and won't shrink away from the surface.
Supplies Checklist
- Marine plywood (sized for your project)
- Fiberglass cloth or CSM
- Epoxy resin + hardener (or polyester if preferred)
- Mixing cups and stir sticks
- Chip brushes or foam rollers
- Plastic spreaders or squeegees
- 80-grit and 120-grit sandpaper
- Acetone or denatured alcohol (cleaning)
- Nitrile gloves and respirator
- Plastic sheeting (drop cloth)
Step-by-Step Process
Step 1: Prepare the Plywood Surface
Surface prep is 90% of the job. A clean, properly prepared surface ensures strong adhesion.
- Sand the plywood with 80-grit sandpaper to create a rough surface for bonding
- Round all edges – fiberglass won't follow sharp corners. Use a router with a 1/4" roundover bit or sand by hand
- Fill any voids with thickened epoxy or wood filler
- Clean thoroughly – wipe with acetone to remove dust, oils, and contaminants
- Let it dry completely – moisture is the enemy of good adhesion
Step 2: Cut Your Fiberglass
Cut the fiberglass fabric 1-2 inches larger than your plywood on all sides. This overlap ensures complete coverage and can be trimmed later.
Pro tip: For complex shapes, make relief cuts at corners to help the fabric lay flat without bunching.
Step 3: Seal the Wood (Optional but Recommended)
Applying a thin seal coat of neat epoxy before laying fiberglass helps:
- Prevent air bubbles from wood pores
- Improve fabric wet-out
- Create a stronger bond
Brush on a thin coat, let it tack up for 20-30 minutes, then proceed with the layup while still tacky.
Step 4: Mix the Resin
Follow your resin manufacturer's mixing ratio exactly. For most epoxy systems:
- Measure by volume (pumps make this easy)
- Mix thoroughly for 2 full minutes
- Scrape the sides and bottom of the cup
- Work in small batches – mixed epoxy generates heat and will kick faster in the cup
Step 5: Wet Out the Fiberglass
This is where the magic happens:
- Lay the dry fabric on the prepared plywood, smoothing out any wrinkles
- Pour resin onto the center of the fabric
- Spread outward using a plastic spreader or squeegee
- Work the resin through – the fabric should turn transparent when fully wet out
- Remove excess resin – you want the weave pattern visible, not floating in a pool of resin
The goal is full saturation without excess. Too much resin adds weight and can cause runs. Too little leaves dry spots that will fail.
Step 6: Remove Air Bubbles
Air bubbles weaken the laminate and look terrible. Here's how to eliminate them:
- Use a bubble roller (grooved aluminum roller) to push air to the edges
- Work from the center outward
- For stubborn bubbles, poke with a pin and squeegee flat
- Check back in 15-20 minutes – new bubbles can appear as the resin penetrates
Step 7: Apply Additional Layers (If Needed)
For structural applications, multiple layers provide more strength. You can apply additional layers:
- Wet-on-wet: Add the next layer while the previous is still tacky (within the resin's open time)
- After cure: Sand lightly with 80-grit, clean, and apply the next layer
Wet-on-wet creates a stronger chemical bond but requires good timing. See our guide on how many layers of fiberglass for specific recommendations.
Step 8: Final Cure and Finishing
Let the laminate cure fully according to your resin's specifications (typically 24-72 hours for epoxy).
Once cured:
- Trim excess fiberglass with a utility knife or oscillating tool
- Sand smooth with 120-grit, then 220-grit
- Apply additional fill coats if a smooth surface is needed
- Paint or gelcoat for UV protection (epoxy degrades in sunlight)
Common Mistakes to Avoid
❌ Using CSM with Epoxy
Standard chopped strand mat uses a binder that only dissolves in styrene (found in polyester and vinyl ester). It won't bond properly with epoxy. Use woven cloth for epoxy projects.
❌ Skipping Surface Prep
Fiberglass won't stick to dirty, oily, or smooth surfaces. Take the time to sand and clean properly.
❌ Working in Bad Conditions
Ideal conditions: 60-80°F, low humidity, no direct sunlight. Cold temperatures slow cure; heat accelerates it unpredictably. High humidity can cause amine blush on epoxy.
❌ Mixing Too Much Resin
Mixed epoxy in a cup generates heat (exothermic reaction). Large batches can kick in minutes and even melt plastic cups. Mix small batches you can use in 10-15 minutes.
❌ Applying Too Much Resin
More resin doesn't mean stronger. The ideal ratio is just enough to fully wet the fabric. Excess resin adds weight, increases brittleness, and wastes money.
How Much Material Do You Need?
Rough estimates for planning:
- Fiberglass cloth: Cut size + 10% for overlap and waste
- Epoxy resin: ~1 quart per 50 sq ft of 6 oz cloth (single layer)
- CSM + polyester: ~1 gallon per 25-30 sq ft of 1.5 oz mat
CSM absorbs significantly more resin than woven cloth – factor this into your budget.
Shop Materials for Your Project
Ready to get started? We stock everything you need:
Questions about your specific project? Contact us – we're happy to help you plan your layup.
Frequently asked questions
Should I use epoxy or polyester resin to fiberglass over plywood?
Epoxy is almost always the right call for plywood. It bonds chemically to the wood fibers, is waterproof, and does not shrink away from the surface as it cures. Polyester is cheaper and kicks fast but shrinks and makes a weaker wood bond, so save it for non-structural or budget work. Vinyl ester sits in between and suits below-waterline and osmosis repair.
Which fiberglass cloth weight works best on plywood with epoxy?
For most plywood projects, 6 oz or 10 oz woven cloth with epoxy works well. The 6 oz gives a smooth, easily wet-out surface for decks and visible areas, while 10 oz builds more thickness per layer for higher-load work. If you go polyester instead of epoxy, 1.5 oz chopped strand mat is the standard choice.
Why shouldn't I use chopped strand mat with epoxy on a plywood layup?
Standard CSM uses a binder that only dissolves in styrene, which lives in polyester and vinyl ester resin, not epoxy. Wet that mat out with epoxy and the binder never breaks down, so the mat will not lay out or bond properly. For any epoxy layup over plywood, use woven cloth and keep the mat for polyester or vinyl ester jobs.
Do I need to seal the plywood before laying the fiberglass?
It is optional but recommended. Brushing a thin coat of neat epoxy onto the prepped plywood first prevents air bubbles from rising out of the wood pores, improves wet-out of the cloth, and creates a stronger bond. Let the seal coat tack up for 20 to 30 minutes, then lay your fabric and wet it out while the seal coat is still tacky.
How much epoxy do I need to fiberglass plywood?
As a planning estimate, figure roughly 1 quart of epoxy per 50 square feet of 6 oz cloth for a single layer. If you are running CSM with polyester instead, plan on about 1 gallon per 25 to 30 square feet of 1.5 oz mat, since chopped strand mat drinks far more resin than woven cloth. Cut fabric to size plus about 10 percent for overlap and waste.
Shop the materials in this guide
- 6 oz fiberglass cloth.
- clear epoxy resin, the right choice for sealing wood.
- polyester layup resin.
- all fiberglass cloth.
Running these jobs for paying customers? Boat Suppliers shop accounts get flat wholesale pricing on the full catalog. Apply for a wholesale account.
Prev post

MEKP Catalyst Guide: Mixing Ratios and Safety
Updated on 25 February 2026
Next post

What is Epoxy Resin? A Complete Guide for Beginners
Updated on 23 February 2026