Vacuum bagging is a powerful laminating method that uses atmospheric pressure to evenly clamp composite materials while they cure. This technique enables stronger, lighter laminates and is widely used in boatbuilding, aerospace, automotive, and DIY applications.
What Is Vacuum Bagging?
Vacuum bagging uses a vacuum pump to remove air from a sealed envelope containing your laminate. The resulting pressure difference clamps all layers evenly, ensuring a void-free bond with minimal resin and maximum fiber content.
Benefits of Vacuum Bagging
- Even pressure distribution: Eliminates uneven force from clamps or staples.
- Superior bond quality: Less resin, fewer voids, stronger adhesion.
- Lightweight parts: Improves resin-to-fiber ratio.
- Complex shapes: Works with simple or curved molds.
- Efficient & scalable: Ideal for small repairs to full hull laminations.
Vacuum Bagging Equipment Checklist
-
Vacuum pump
- Sized to your project (pressure and flow).
- Key specs: Vacuum pressure (inHg) & air volume (CFM).
-
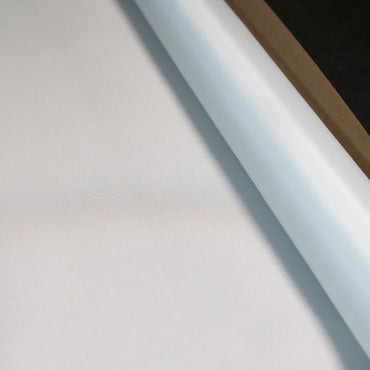
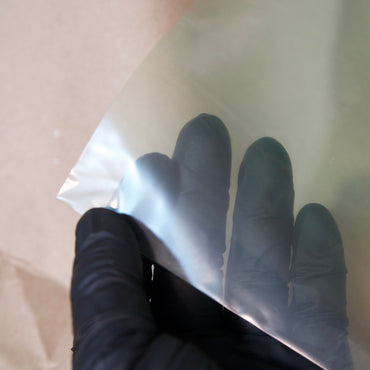
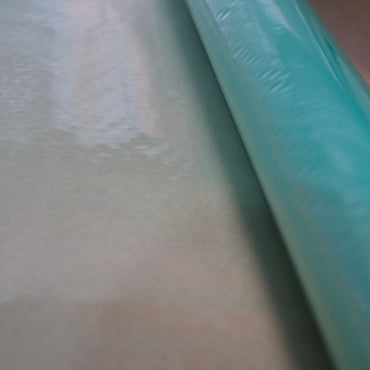
Vacuum bag film
- Heat-resistant plastic (e.g., nylon) that forms the vacuum envelope.
- Learn more about vacuum bagging film setup.
- Shop vacuum bagging materials
- Mastic sealant: Sticky tape to create airtight seals between mold and bag.
- Release fabric (peel ply): Prevents breather from sticking; removes cleanly post-cure.
- Perforated film (optional): Regulates resin bleed-through.
- Breather fabric: Lets air reach the vacuum port; absorbs excess resin.
- Vacuum lines, valves & trap: Connect pump to bag; keeps epoxy out of the pump.
- Vacuum gauge: Monitor vacuum during cure. Typical target: 12–25 inHg.
Mold Types
- Flat mold: Smooth, sealed worktable surface.
- Curved mold: Built from plugs (positive forms) using fiberglass/epoxy.
- Envelope bagging: Entire mold inside the bag—ideal for small or thin parts.
Step-by-Step: Vacuum Bag Laminating
Example: Laminating a Fiberglass Rudder
-
Prepare the mold
- Clean and wax mold surface.
- Apply mold release.
- Optional: apply epoxy gelcoat.
-
Lay up the laminate
- Wet out fiberglass layers and place in mold.
- Add core material if needed.
- Wet out additional layers as required.
-
Add release layers
- Lay peel ply.
- Optionally add perforated film (useful at higher vacuum levels or long open times).
-
Add breather and vacuum bag
- Lay breather fabric on top.
- Drape vacuum bag film and seal edges with mastic.
-
Insert vacuum port and gauge
- Puncture a small hole in the bag for the port.
- Place extra breather under the port to prevent epoxy suction.
-
Apply vacuum
- Start the pump and watch the gauge.
- Check for leaks around seals and folds.
- Maintain vacuum until epoxy fully cures.
- Remove layers and demold
- Peel off bag, breather, and release film.
- Pry laminate from mold with plastic wedges.
- Trim, sand, and finish.
Tips for Better Results
- Always test your system before adding epoxy.
- Avoid bridging—ensure fabric reaches into all corners.
- Use perforated film for high vacuum or long open-time epoxies.
- Don't overtighten vacuum—avoid starving the laminate of resin.
- Consider resin ratios when planning your layup.
- Post-curing: Some projects require heat to reach final strength (check resin specs).
Applications Beyond Boats
- Rudders, centerboards
- Deck panels
- Carbon-fiber components
- Cold-molded hulls
- Lightweight hatches or beams
Troubleshooting Vacuum Bagging
- Leaks? Check mastic, folds, and port seals.
- Low vacuum? Confirm pump CFM and bag integrity.
- Voids? Watch for bridging; ensure proper wet-out and compaction.
Ready to Start Vacuum Bagging?
For complex molds, you may also need to learn how to make molds from plugs.
👉 Vacuum Bagging Supplies at Boat Suppliers
Frequently asked questions
What vacuum level should I target when bagging a laminate?
For most epoxy laminating work the typical target is 12 to 25 inHg on the gauge. That is enough atmospheric pressure to clamp the layers evenly, drive out voids, and improve the resin-to-fiber ratio without crushing the laminate. Do not just crank the pump to the max. Too much vacuum on a wet layup can starve the part of resin, so dial it to your target and hold it steady until the epoxy fully cures.
What equipment do I need to start vacuum bagging?
The core stack is a vacuum pump sized to your part by pressure and CFM, nylon bag film, mastic sealant tape, peel ply release fabric, breather fabric to carry air to the port and soak up excess resin, vacuum lines with valves and a resin trap to keep epoxy out of the pump, and a gauge to monitor vacuum. Perforated film is optional and helps regulate resin bleed on high-vacuum or long open-time layups.
How do I stop epoxy from getting sucked into my vacuum pump?
Two things protect the pump. Run a resin trap in the vacuum line between the bag and the pump to catch any resin that migrates, and place extra breather fabric directly under the vacuum port so resin cannot be pulled straight into the fitting. The breather feeds air to the port while absorbing stray resin, and the trap is your backup. Skipping either one risks pulling epoxy into the pump and ruining it.
What is bridging in vacuum bagging and how do I prevent it?
Bridging is when the bag film or fabric spans across a corner or recess instead of pressing down into it, leaving an unconsolidated void with no pressure on the laminate. Prevent it by making sure the fabric and bag reach fully into every corner and inside curve before you pull vacuum, adding pleats of extra film at tight features so the bag has slack to conform. Bridging shows up later as voids in the finished part.
Do I need to post-cure a vacuum-bagged part?
Sometimes. Many epoxy systems reach full mechanical strength only after a heat post-cure, so check the resin manufacturer specs for your system. The bag and vacuum get you a void-free, high fiber-content laminate, but the resin still has to fully cross-link. Keep the part under vacuum until the epoxy cures, then run any post-cure schedule the resin calls for before you put structural loads on the part.
Shop the materials in this guide
- nylon bagging film.
- peel ply release fabric.
- sealant tape.
- the vacuum bagging sample pack, a kit to try the whole stack.
- all vacuum bagging supplies.
Running these jobs for paying customers? Boat Suppliers shop accounts get flat wholesale pricing on the full catalog. Apply for a wholesale account.
Prev post

How Is Fiberglass Chopped Strand Mat Made?
Updated on 15 August 2025
Next post

How Is Fiberglass Cloth Made?
Updated on 09 August 2025