Gelcoat Repair and Restoration: A Complete How-To Guide

11 August 2026
Whether you've just scraped your hull against a dock cleat or discovered a cluster of blisters after hauling your boat, gelcoat repair is one of the most valuable skills a boat owner can have. Done right, a gelcoat repair is virtually invisible — the kind of fix that makes you wonder why you ever hesitated to tackle it yourself. Done wrong, it leaves a chalky patch that weathers unevenly and peels within a season. This guide is designed to make sure you get it right the first time, from prepping the damaged area all the way through final buffing.
Understanding What Gelcoat Actually Is
Gelcoat is not paint. It's a pigmented polyester resin, typically 15–25 mils thick, that forms the outer cosmetic and protective skin of a fiberglass hull. Because it's a resin, it behaves differently than paint — it cures chemically rather than drying, it can be built up in layers, and it sands and polishes to a high gloss. This matters for repair because you can't simply roll on a coat of matching color and expect it to blend. You need to match the resin chemistry, color, and surface profile of the original.
Assessing the Damage: Scratch, Gouge, Crack, or Blister?
Before you open a single container, take a close look at what you're dealing with. The repair approach changes significantly depending on the type of damage:
- Surface scratches: These affect only the top layer of gelcoat. Many can be polished out with a cutting compound without any material addition at all. If the scratch is white and shallow, try polishing first.
- Gouges and chips: These remove material and leave a crater that must be filled. This is classic gelcoat scratch repair territory — clean out the damage, fill, cure, sand, and polish.
- Star cracks and stress cracks: These radiate from an impact point. They often indicate flex or structural movement underneath. If you fill without addressing the root cause, the cracks return. Investigate whether the underlying laminate needs reinforcement before proceeding.
- Blisters: Gelcoat blister repair is its own process. Blisters form when water migrates through the gelcoat and creates osmotic pressure between the skin coat and the laminate. Pop the blister, let it dry completely (weeks, not days), neutralize any acid residue, fill with an epoxy filler, and then re-coat. Using polyester gelcoat directly over an active blister repair without an epoxy barrier coat is a recipe for the problem coming back.
Tools and Materials You'll Need
Gathering everything before you start is critical — gelcoat with hardener added has a limited working time, and you don't want to be hunting for sandpaper while your mix kicks.
- Gelcoat or gel paste matched to your hull color
- MEKP hardener (usually included in kits)
- Styrene thinner (for brush or spray application)
- Mixing cups and stir sticks, or a power mixer for larger batches
- Acetone for surface prep and tool cleanup
- Sandpaper in grits: 80, 180, 320, 400, 600, 800, 1000, 1500, 2000
- Tack cloth
- Plastic sheeting or cellophane tape (to exclude air during cure)
- Polishing compound and buffer
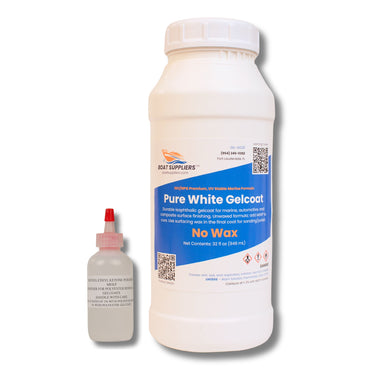
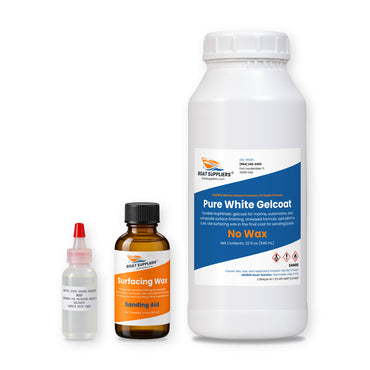
For the gelcoat itself, you have a few good options depending on the scope of the work. For typical chips and scratches, the Gelcoat Repair Kit — Pure White Gelcoat Quart with Wax, Hardener & 6 Pigment Colors ($49.95) is a practical all-in-one solution. It uses professional-grade isophthalic gelcoat with surfacing wax already blended in, meaning each coat cures tack-free without any additional surface treatment. The six included pigments let you dial in your color match on-site.
For larger panel repairs or situations where you need to restore the original factory finish across a broader area, the Evercoat One Step Finish Gel Coat — White ($100.69) steps up the quality level. This ISO NPG formulation is specifically engineered to match the high-gloss finish of production fiberglass boats and is the right choice when you're spraying rather than brushing.
If you're filling deep gouges or working on a heavily textured surface, the Polyester Gel Paste Pint ($79.09) is worth having. Its paste consistency stays put in vertical or overhead repairs without sagging, and it accepts coloring agents for a closer match.
Step-by-Step: How to Apply Gelcoat for a Lasting Repair
Step 1 — Prepare the Damaged Area
Clean the repair area with acetone on a lint-free rag. If you have a gouge or chip, use a Dremel or carbide scraper to bevel the edges at roughly 45 degrees — this gives the new gelcoat mechanical purchase and prevents a sharp edge that can lift later. For star cracks, route out each crack line to a V-groove about 1/16" deep. Wipe clean with acetone again and let it flash off completely. Before you begin any grinding or sanding work, make sure you have appropriate protective gear for resin work on hand — gelcoat dust and styrene vapors require proper respiratory and skin protection.
Step 2 — Address Any Structural Issues First
If your damage goes through the gelcoat into the laminate, you need to restore the fiberglass before applying cosmetic gelcoat on top. The West System Fiberglass Boat Repair Kit ($58.42) is purpose-built for exactly this scenario — it includes pre-measured 105/205 epoxy, fiberglass cloth, and fairing filler to rebuild structural laminate before you finish the surface. Get the substrate solid, fair it flush, and then proceed to gelcoat.
Step 3 — Mix Your Gelcoat
Color matching is the step most DIYers underestimate. Even "white" boats vary significantly — warm whites, cool whites, off-whites with a hint of grey or yellow. Mix small test batches using the included pigments and compare against the hull in natural daylight, not fluorescent shop lighting. Allow the test patch to cure fully before judging the color — wet gelcoat always looks darker than cured gelcoat.
Once you have your color dialed in, measure your hardener carefully. The standard ratio is 1–2% MEKP by volume. In hot weather (above 80°F), use the lower end. In cool weather (below 65°F), use the higher end. Mix thoroughly for a full two minutes — unmixed streaks cause soft spots in the cure. For larger batches, a 16" Steel Power Mixer ($12.95) attached to a drill makes this fast and consistent. Its hexagonal shaft locks securely in any chuck, and the 2-3/8" mixing head turns a gallon-sized batch of gelcoat into a uniform mix in under a minute.
Step 4 — Thin for Your Application Method
If you're brushing the gelcoat into a small repair, you may need to reduce the viscosity slightly so it levels into the repair cavity without brush marks. Styrene thinner ($10.99) is the correct reducer for polyester gelcoat — add 5–10% by volume for brush application, and up to 20% if you're spraying. Avoid over-thinning, as excess styrene slows the cure and can affect the final hardness.
Step 5 — Apply in Thin Layers
Brush or trowel the gelcoat into the repair in thin coats — no more than 20–25 mils per pass. Multiple thin coats cure more uniformly than one thick application. Slightly overfill the repair on the final coat to allow for shrinkage during cure and material removal during sanding. To help the surface cure tack-free, cover the wet gelcoat immediately with a piece of plastic sheeting pressed flat, or apply a strip of cellophane tape. If you're using a waxed gelcoat formulation (like the repair kit above), the wax migrates to the surface during cure and seals out oxygen automatically.
Step 6 — Sand Progressively
Once fully cured (typically 2–4 hours in warm conditions), remove the covering and begin wet-sanding. Start at 320 grit to level the repair flush with the surrounding gelcoat, then work progressively through 400, 600, 800, 1000, 1500, and 2000. Keep the surface wet throughout and use a flat backing block to avoid creating low spots. Each grit should fully remove the scratches left by the previous one before you move up. For a deeper dive into getting a flawless result, our complete guide to sanding fiberglass covers technique and grit selection in detail.
Step 7 — Polish to a Gloss
After 2000 grit, the surface will look hazy but smooth. Finish with a cutting compound on a rotary buffer or by hand to bring up the gloss, then follow with a finishing polish. A well-executed repair should be indistinguishable from the surrounding hull under normal lighting.
Common Mistakes to Avoid
- Skipping the bevel: Square edges on a repair area almost always lead to edge lifting within a season.
- Wrong MEKP ratio: Too little and the gelcoat stays tacky. Too much and it cures too fast, trapping bubbles and causing shrinkage cracks.
- Judging color when wet: Always let a test patch cure for at least an hour before comparing to the hull.
- Polishing too soon: Gelcoat that hasn't fully cured will gum up sandpaper and polish unevenly. Give it adequate cure time.
- Applying gelcoat over osmotic blisters without an epoxy barrier: Polyester is permeable to water. For blister repairs, always seal with epoxy first.
Final Thoughts
A solid gelcoat repair is genuinely achievable for any boat owner willing to take their time with prep and color matching. The products exist to do it at a professional level — the difference between a repair that shows and one that disappears is almost always in the preparation and the progressive sanding, not the gelcoat itself. Stock your repair kit with the right materials before you need them, and the next ding or scratch becomes a manageable afternoon project rather than a costly boatyard bill. If you're approaching the season and want a systematic approach to evaluating your hull, our spring fiberglass inspection checklist is a great place to start.
Shop the materials in this guide
Prev post

Customer Spotlight: Bringing a 2002 Surfboard Back with Thin Clear Epoxy
Updated on 12 August 2026
Next post

Customer Spotlight: A Poured Foam Race Seat for a Vintage Lola T342
Updated on 09 August 2026