DIY Fiberglass Canoe Build: A Complete Step-by-Step Guide From Mold to Water

21 July 2026
Building your own DIY fiberglass canoe is one of the most rewarding projects a boater or outdoor enthusiast can take on. Whether you're drawn to the idea of paddling something you built with your own hands, or you want a lightweight custom hull that no production canoe can match, the fiberglass construction process is more approachable than most people expect. This guide walks you through the entire build — from shaping your form to rolling on your final laminate layers — with the kind of practical, fabricator-level detail that actually gets you to the water.
What this build needs
Everything below is in stock and ships from our Florida shop.


Choosing Your Build Method: Mold, Strip, or Foam Core?
Before you buy a single yard of cloth, you need to decide how you're going to shape your canoe. There are three common approaches for a DIY fiberglass canoe build, and each has real trade-offs.
Canoe Mold Fiberglass Method
The plug-and-mold approach gives you the cleanest exterior finish and the most repeatable results if you plan to build more than one hull. You carve or assemble a plug (a solid male form of the canoe's exterior), then lay fiberglass over it to create a female mold. Once the mold is done, you laminate inside it to produce your actual hull. The downside: you're essentially building two boats before you build one. For a single-build project, this is often overkill — but if you want a glassy, production-quality exterior, it's unbeatable. The full hull layup sequence is covered in building a boat from a mold. If you want to go deeper on the mold-making process, this step-by-step guide to fiberglass molds covers marine applications in detail.
Strip Canoe Fiberglass Method
The strip-built method is the most popular choice for first-time builders and for good reason. You staple or glue thin cedar strips (typically ¼" × ¾") over a series of MDF station molds mounted on a strongback, creating a smooth curved hull form. Once the strips are shaped and faired, you apply fiberglass cloth and epoxy to both the interior and exterior. The wood core adds stiffness and beauty; the fiberglass skin provides waterproofing and structural integrity. A strip canoe fiberglass layup produces a hull that is stiff, relatively light, and stunning to look at.
Foam Core Method
Closed-cell foam (typically 2 lb/ft³ PVC or Divinycell) can be cut, heat-formed, and glued into a canoe shape, then glassed on both sides. This is faster than strip building and results in an excellent strength-to-weight ratio. It's a good option if you're comfortable working with foam and want to skip the woodworking phase entirely.
For this guide, we'll focus primarily on the strip canoe fiberglass method, since it's the most accessible, produces the most consistently fair hulls, and is the approach most hobby builders actually complete successfully.
Materials You'll Need to Build a Fiberglass Canoe
Getting your material list right before you start is critical. Running out of resin mid-laminate or using the wrong weight of cloth are the mistakes that derail otherwise solid builds.
Fiberglass Mat: Choosing the Right Weight
For a canoe hull, you'll use fiberglass mat in two different weights depending on where it's going.
For the interior of the hull — especially in the bow and stern ends where the shape gets complex — the 0.75oz Fiberglass Chopped Strand Mat is ideal. At this weight, it conforms readily to tight compound curves without bridging or wrinkling, and it keeps the overall weight of the finished hull down. It wets out quickly and doesn't require aggressive rollout to eliminate air.
For the exterior skin and the flat center sections of the hull floor where you need a bit more abrasion resistance and impact strength, step up to the 1.5oz Fiberglass Chopped Strand Mat. This mid-weight mat gives you the balance of drapability and mechanical strength that the bottom of a working canoe demands. It's also the right choice for adding a second reinforcement layer in high-stress areas like the keel line and just inside the gunwales.
For the seams — particularly where the interior fiberglass meets the sheer line — 1.5oz Fiberglass Mat Tape is a cleaner solution than cutting strips from a full roll. It gives you a consistent width, reduces waste, and produces a neat, strong bond along edges and seams without the raggedy fringes you get from hand-cut strips.
Epoxy Resin and Hardener
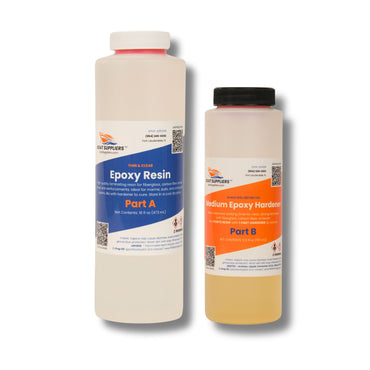
For a canoe build, epoxy is the correct resin choice — not polyester, and not vinyl ester. Epoxy bonds chemically to wood, doesn't shrink as it cures, and gives you the kind of clarity and moisture resistance you need for a hull that's going to spend its life wet.
The West System 105 Epoxy Resin has been the standard for wooden and composite boat building for decades, and for good reason. It has low viscosity, penetrates wood fibers well, and produces an extremely durable, hard cure. For a 16-foot canoe hull, plan on using 1.5 to 2 gallons of mixed epoxy across all your laminating, filleting, and fill-coat steps.
Pair it with the West System 207 Special Clear Hardener. The 207 is specifically formulated for clear-finish applications — it resists blushing (the milky surface haze that forms when moisture contacts uncured epoxy) and cures to a water-clear film. On a strip canoe where you want the wood grain to show through, this matters a great deal. Mix ratio is 3 parts 105 to 1 part 207 by volume.
Application Tools
Rolling out epoxy-saturated fiberglass mat correctly is the difference between a strong, void-free laminate and a bubbly, weak one. A good roller set does most of the work. The Fiberglass Roller Starter Kit (Corner, Radius & Standard) gives you the three profiles you actually need: the standard roller for open panels, the radius roller for curved sections along the hull bottom, and the corner roller for getting into the stems and chines without leaving dry spots. Use firm, overlapping strokes and work methodically from the centerline outward.
The Build Process, Step by Step
Step 1: Cut and Set Up Your Station Molds
Transfer your canoe's station offsets onto ¾" MDF and cut out each station profile. Mount them on a level strongback at the correct spacing — typically 12" apart for a 15- to 17-foot hull. Check that every station is plumb and that the centerline is consistent from bow to stern before you strip a single stick.
Step 2: Strip the Hull
Starting at the sheer line, staple or bead-and-cove your cedar strips around the form, working toward the keel. Keep your joins tight. Spend time fairing as you go — a batten held against the hull tells you immediately where high and low spots are developing. A well-faired strip hull before glassing will save you hours of sanding after.
Step 3: Sand and Prep
Once fully stripped, remove staples, fill any gaps with thickened epoxy, and fair the exterior with 80-grit, then 120-grit. The hull should be smooth enough to read a reflection across before you glass it. Before you begin laminating, make sure you have the right PPE for fiberglass and resin work on hand — respirator, gloves, and eye protection are non-negotiable at this stage.
Step 4: Laminate the Exterior
Apply a wet-out coat of 105/207 epoxy to the bare wood. While it's still tacky, lay your 1.5oz mat onto the hull and wet it out with additional epoxy, using your roller kit to chase out every bubble. Apply a second layer at the keel and stems. Allow to cure fully, then sand lightly with 120-grit before flipping the hull.
Step 5: Remove the Hull from the Form and Glass the Interior
Pop the hull off the station molds carefully. Inside, you'll use the 0.75oz mat for the tight curves at the ends, and the 1.5oz mat for the open sections of the hull floor and sides. Use the mat tape along the sheer line to cap the edge cleanly. Apply two to three fill coats of neat epoxy to fully encapsulate the weave.
Step 6: Install Thwarts, Seats, and Gunwales
Attach ash or cherry gunwales, install your seats on hanging drops or fixed risers, and add thwarts for rigidity. All wood-to-hull joints get a fillet of thickened epoxy before any hardware is fastened.
Step 7: Finish and Launch
Final sand with 220-grit, then apply your topcoat — varnish if you want UV protection and gloss, or a two-part linear polyurethane if you want the most durable finish available. Allow full cure time before launching.
Final Thoughts
A DIY fiberglass canoe build is a real commitment — expect 150 to 250 hours from strongback to water for a first-time builder — but the result is a hull that fits exactly how you paddle, weighs exactly what you need, and will last for decades with basic care. If you're newer to composite work, it's worth reviewing some beginner fiberglass projects and tips before diving into a full hull build. Start with quality materials, take your time on the fairing and laminating steps, and the process is genuinely straightforward. The hardest part is getting started.
Prev post

Replacing Waterlogged Flotation Foam at Haul-Out: A Complete Pour Foam Guide
Updated on 24 July 2026
Next post

Fiberglass vs Aluminum Boat: Repair and Maintenance Costs Compared
Updated on 17 July 2026