Haul-Out Inspection: Gelcoat Blister Repair Before Winter Storage

23 October 2026
The boat is on the hard, the bottom is still wet from the pressure wash, and you have about an hour before the hull dries to decide what gets fixed now and what waits for spring. The rule for gelcoat blister repair and cracks is the same: open anything that holds water now, so it dries over storage, and close anything cosmetic in spring when it is warm enough to cure gelcoat. Blisters get ground and drained in October and filled in April. Stress cracks get opened and sealed with epoxy now, gelcoated later.
Read the hull in the first hour
Blisters show best while the bottom is wet and the paint is still dark: they stand up as domes, sometimes with a pinhole weeping fluid that smells like vinegar. Circle every one with a grease pencil before the hull dries and they flatten. Then tap the whole bottom with the handle of a plastic mallet; a sharp click is sound laminate, a dull thud is delamination or wet core. Above the waterline, look at every fitting, corner, and hatch edge for crazing. A moisture meter is worth borrowing: read a known-dry topside area first, then compare the bottom. Readings that stay high in the same spots after two weeks on the hard mean water in the laminate, not surface wet.
Blisters: open now, fill in spring
Osmotic blisters are fluid trapped between gelcoat and laminate, and the fluid is acidic. On the hard, grind each blister open with 36 grit on a right-angle grinder until you reach sound, dry-looking glass, then rinse the cavity with fresh water to flush the acid. Leave them open. Over a dry storage season the laminate gives up its water; over a wet one under a tarp it does not, so store the boat where air moves under the hull.
In spring, when the cavities read dry on the meter and the hull is above 60°F (16°C), fill them with epoxy fairing compound, not gelcoat. Below the waterline gelcoat is the wrong material: it is porous to water over time, which is how the blisters started. Pettit EZ-Fair Two-Part Epoxy Fairing Compound is built for this: a lightweight two-part epoxy putty mixed 1:1 that does not shrink back and stays flush under water. Trowel it proud, sand fair with 80 grit, then barrier coat and bottom paint. If the blisters run more than about one per square foot across the whole bottom, that is a peel-and-relaminate job, and it belongs at a yard with a gelcoat peeler.
Cracks: which ones need opening
| What you found | Fix now or spring | Material |
|---|---|---|
| Spider crazing at a cleat, stanchion, or hatch corner | Open and seal now; gelcoat in spring | Epoxy from the repair kit, then gelcoat |
| Star crack with a crushed center (impact) | Now: grind from behind and laminate | Epoxy and cloth from the repair kit |
| Hairline crazing on a flat deck, no fitting nearby | Spring, cosmetic | Gelcoat repair kit |
| Chips and gouges above the waterline | Spring, unless they reach glass | Gelcoat repair kit, tinted to the hull |
| Blisters below the waterline | Open now, fill in spring | EZ-Fair, then barrier coat |
The crack that matters is the one that goes through gelcoat to the laminate and holds water. Water in a crack freezes, expands, and lengthens the crack every cycle. So the fall job is to open it and close it against water, even if the finish waits. Grind a V along the crack with a rotary tool until you are into glass, wipe with solvent, and fill with epoxy. The West System Fiberglass Boat Repair Kit has pre-measured 105/205 packets, cloth, and both adhesive and fairing fillers, which is exactly the fall kit: 205 is the fast hardener, with a pot life of 9 to 12 minutes at 72°F, and it cures in a cold October shop where a slow hardener would not.
Gelcoat repair in spring: the numbers
| Step | Spec |
|---|---|
| Substrate | Epoxy fully cured, washed with water for amine blush, sanded 80 grit |
| Catalyst | MEKP at 2% at 70°F (21°C), about 19 cc per quart; never below 1.25% or above 2.5% |
| Film | 15 to 20 mils wet, two coats |
| Cure | Waxed gelcoat goes tack-free on its own; unwaxed needs PVA or wax added |
| Finish | Wet sand 320, 600, 1000, then compound and polish |
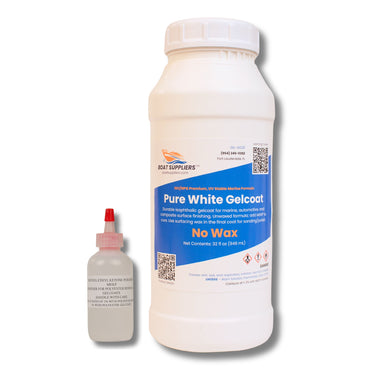
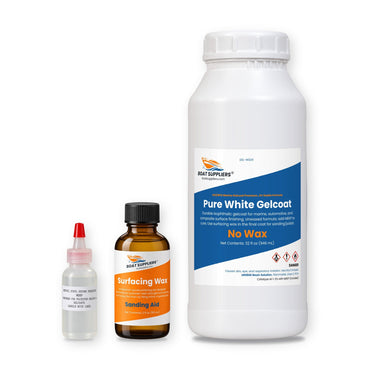
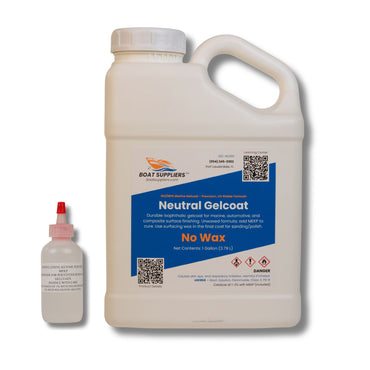
For a white hull, the Gelcoat Repair Kit, Pure White Gelcoat, Surfacing Wax, Hardener and Tinting Pigments is the direct answer: unwaxed isophthalic white for the build coats, surfacing wax to stir into the final coat so it cures tack-free and sands clean, and 1 oz each of carbon black and yellow pigment to move the white toward the boat. Most boats are not pure white, and a fresh white patch on an oyster or almond hull is more visible than the crack was. A touch of yellow warms the white toward cream or ivory and a touch of black cools it toward grey; tint against a chip you have sanded and wetted, not the chalky surface next to it. For a colored hull, start from Neutral Gelcoat with Hardener, No Wax, a tintable base that cures translucent, and bring it to the hull color with Liquid Colored Pigments. Dose catalyst with the MEKP catalyst calculator and size the job with the gelcoat calculator.
If you spray the repair through a touch-up gun, thin with Styrene, Thinner for Polyester Resins and Gelcoats at no more than 10%. Styrene is reactive and cures into the film; acetone evaporates out and leaves a soft, under-cured patch. Wear a P100 respirator with organic vapor cartridges, nitrile gloves, and eye protection for grinding and for anything with styrene in it.
Frequently asked questions
Should I repair hull blisters in fall or spring?
Both, in that order. Grind every blister open with 36 grit at haul-out and rinse the acid out, then leave the cavities open all winter so the laminate dries. Fill in spring with a 1:1 epoxy fairing compound like EZ-Fair once the meter reads dry and the hull is above 60°F, then barrier coat before bottom paint. Filling a wet blister in October traps the water that caused it.
Can I use gelcoat to fill blisters below the waterline?
No. Gelcoat is a polyester finish and it lets water through slowly, which is how osmotic blisters form in the first place. Fill below-waterline blisters with epoxy fairing compound, sand fair with 80 grit, and follow with an epoxy barrier coat at the film build on the can. Keep gelcoat for chips, cracks, and cosmetic repairs above the waterline.
How do I fix gelcoat stress cracks around a cleat?
Crazing at a fitting means the laminate flexes there. Pull the fitting, grind a V along each crack into the glass, and fill with epoxy; the West System repair kit's 105/205 packets cure in about 6 to 8 hours at 72°F. Add a backing plate under the cleat before it goes back on, or the cracks return. Gelcoat over the epoxy in spring at 15 to 20 mils.
How much MEKP do I add to a quart of gelcoat?
At 70°F, 2% by volume, which is about 19 cc per quart. Drop toward 1.5% (about 14 cc) when the shop is above 85°F, and never go below 1.25% or above 2.5%, because under-catalyzed gelcoat stays soft and over-catalyzed gelcoat cracks. Mix only what you can spread in 15 minutes, and use the MEKP catalyst calculator for odd batch sizes.
Can I do gelcoat repairs in cold weather?
Not below 60°F. Polyester gelcoat cures slowly and incompletely in the cold, and the surface stays tacky and dull. In fall, do the structural part with epoxy and a fast hardener like West 205, which works down to about 40°F, then gelcoat in spring when the hull surface itself, not just the air, reads 60°F or better for a full day.
What You Need For This Job
- Pettit EZ-Fair Two-Part Epoxy Fairing Compound: 1:1 epoxy fairing for blister cavities below the waterline
- West System Fiberglass Boat Repair Kit: pre-measured 105/205 packets and cloth for sealing cracks in fall
- Gelcoat Repair Kit, Pure White Gelcoat, Surfacing Wax, Hardener and Tinting Pigments: white gelcoat, surfacing wax and two tints for spring cosmetic repairs
- Neutral Gelcoat with Hardener, No Wax: tintable base for off-white and colored hulls
- Styrene, Thinner for Polyester Resins and Gelcoats: reactive thinner for spraying gelcoat, up to 10%
Next post

What Is Coosa Board? Bluewater 26 vs Nautical 15, Weights and Sizes
Updated on 22 October 2026