How to Properly Fiberglass a Boat Hull for Maximum Durability

21 February 2026
Fiberglassing a boat hull is a crucial process that ensures strength, water resistance, and longevity. Whether you're building a new boat or repairing an existing hull, using the right techniques and materials will help you achieve a professional-grade finish. Below, we'll guide you through the essential steps to fiberglass a boat hull for maximum durability.
Step 1: Gather Your Materials
Before you start, make sure you have all the necessary materials:
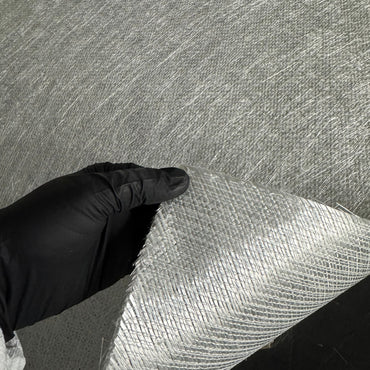
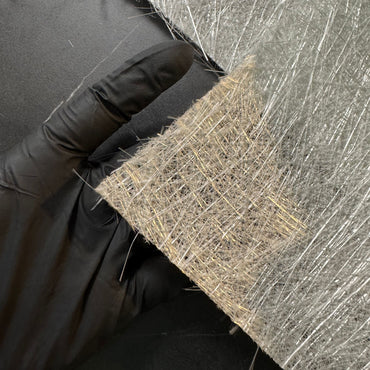
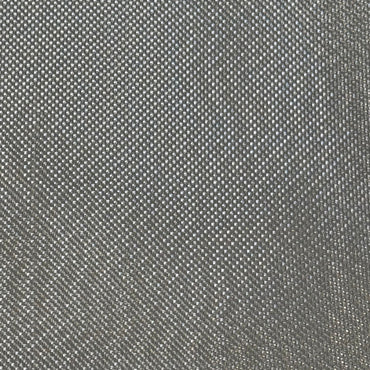
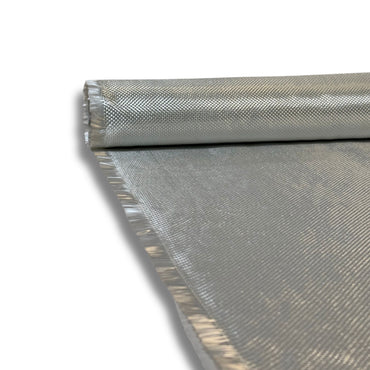
- Fiberglass cloth or mat – Choose between woven cloth for strength or chopped strand mat for bulk.
- Resin – Polyester, vinyl ester, or epoxy, depending on your needs.
- Hardener/Catalyst – Required to initiate resin curing.
- Acetone – For cleaning tools and surfaces.
- Sandpaper (60-120 grit) – For surface preparation and finishing.
- Rollers and Brushes – To apply resin and remove air bubbles.
- Protective Gear – Gloves, respirator, and safety glasses.
Step 2: Prepare the Hull Surface
Proper surface preparation is essential for adhesion:
- Clean the hull – Remove dirt, grease, and old paint using acetone or marine cleaner.
- Sand the surface – Rough up the area with 60-80 grit sandpaper to improve resin bonding.
- Check for damage – Repair any cracks, holes, or weak spots before applying fiberglass.
- Mask off areas – Protect surrounding surfaces with masking tape and plastic sheeting.
Step 3: Cutting and Layering Fiberglass
- Measure and Cut – Pre-cut fiberglass cloth or mat to fit the hull area.
- Dry Fit First – Lay the material on the hull to check for proper placement before applying resin.
- Layering Plan – Use multiple layers, starting with lighter fiberglass and adding thicker layers for reinforcement. For structural repairs, consider using biaxial fiberglass for enhanced strength.
Step 4: Mixing and Applying Resin
- Mix Resin and Hardener – Follow the manufacturer's ratio for correct curing.
- Apply the First Layer – Brush or roll a thin layer of resin onto the hull.
- Lay Fiberglass Over Resin – Gently place the fiberglass material onto the wet resin.
- Saturate the Fiberglass – Use a roller to evenly distribute resin, ensuring no dry spots.
- Remove Air Bubbles – Roll out any trapped air pockets to avoid weak spots.
- Repeat as Needed – Add multiple layers, letting each partially cure before adding the next.
Step 5: Curing and Finishing
- Allow Full Cure – Follow the recommended curing time for your resin type.
- Sand the Surface – Use 80-120 grit sandpaper for a smooth finish.
- Apply Gelcoat or Paint – Seal and protect the fiberglass with a durable marine coating.
- Final Inspection – Check for imperfections and apply touch-ups if necessary.
Final Thoughts
Properly fiberglassing a boat hull ensures it remains strong, watertight, and resistant to wear for years to come. By following these steps and using high-quality materials, you can achieve a professional and durable finish. For specific repairs like damage to the transom, refer to our transom repair guide for targeted solutions.
Looking for top-quality materials? We got you covered with fiberglass, resins, and fiberglass tools? Visit our Fiberglass & Carbon
Frequently asked questions
How should I prep a hull surface before fiberglassing?
Start clean: strip dirt, grease, and old paint with acetone or a marine cleaner. Rough up the surface with 60 to 80 grit sandpaper so the resin has tooth to bond to, then repair any cracks, holes, or weak spots before you lay glass over them. Mask off and protect the surrounding areas with tape and plastic sheeting so you only put resin where you want it.
What layering plan gives the strongest hull lay-up?
Measure and pre-cut your fiberglass, then dry-fit each piece on the hull to confirm placement before any resin goes down. Build in multiple layers, starting with lighter fabric against the surface and adding thicker layers for reinforcement. For structural areas, step up to 1708 biaxial for strength, and use 18 oz woven roving when you need to build thickness fast. Let each layer partially cure before adding the next.
Which resin should I use to fiberglass a boat hull?
Pick based on the job: polyester for general work, vinyl ester for better water resistance and a stronger bond, or epoxy for the toughest adhesion and structural repairs. Whatever you choose, mix it with the correct hardener or catalyst at the manufacturer ratio. Polyester and vinyl ester kick with MEKP catalyst, while epoxy uses a hardener, so match the curing agent to the resin system.
How do I keep air bubbles and dry spots out of the laminate?
Brush or roll a thin layer of resin onto the hull first, then lay the fiberglass gently into the wet resin. Use a roller to evenly distribute resin through the cloth so there are no dry spots, then go back over it to roll out every trapped air pocket. Air voids and dry spots are weak points, so consolidate fully on each layer before moving on.
What grit do I sand to before applying gelcoat or paint?
For final finishing, sand the cured laminate with 80 to 120 grit to smooth it out before you topcoat. During the prep stage you rough the bare hull with coarser 60 to 80 grit for adhesion. After full cure and final sanding, seal and protect the work with gelcoat or a durable marine paint, then do a final inspection and touch up any imperfections.
Shop the materials in this guide
- 1708 biaxial, the structural hull workhorse.
- 18 oz woven roving, for fast thickness build.
- polyester layup resin.
- all biaxial fabrics.
Running these jobs for paying customers? Boat Suppliers shop accounts get flat wholesale pricing on the full catalog. Apply for a wholesale account.
Prev post

How to Choose Your Fiberglass Chop Mat Size
Updated on 21 February 2026
Next post

What Is Chopped Strand Mat? A Beginner's Guide to Fiberglass Mat
Updated on 21 February 2026