Table Top Epoxy: How to Pour a Perfect Crystal-Clear Finish Every Time

03 April 2026
Creating a stunning, glass-like finish on wooden tables, bar tops, and countertops has never been more achievable thanks to modern table top epoxy systems. Whether you're refinishing a cherished dining table or crafting a custom bar for your boat's cabin, mastering the art of epoxy pouring will give you professional results that protect and beautify your surfaces for years to come.
In this comprehensive guide, we'll walk you through every step of the process, from surface preparation to final curing, ensuring your next epoxy project turns out flawless.
Understanding Table Top Epoxy Systems
Table top epoxy is a specialized two-part resin system designed to create thick, crystal-clear coatings on horizontal surfaces. Unlike thin epoxy coatings used for sealing, these systems are formulated to be poured in thicker layers (typically 1/8" to 1/4") without generating excessive heat that could cause cracking or bubbling.
The key characteristics of quality clear epoxy for tables include:
- Self-leveling properties for smooth, even coverage
- UV resistance to prevent yellowing over time
- Low viscosity for easy mixing and bubble release
- Extended working time for large projects
- High gloss, glass-like finish when cured
For marine applications, these same properties make table top epoxy perfect for cabin tables, galley countertops, and chart tables that need to withstand the challenging marine environment.
Essential Tools and Materials for Your Table Top Epoxy Project
Before diving into the pouring process, gather these essential items:
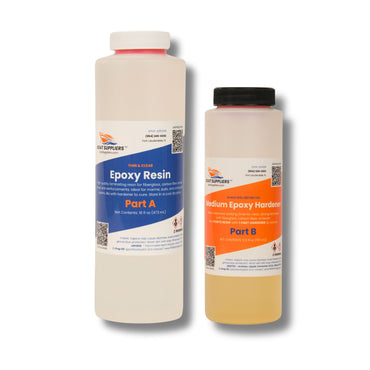
- High-quality epoxy resin system like the Boat Suppliers Table Top Kleer Kote Epoxy Resin
- Digital scale for precise measurements
- Mixing containers and stir sticks
- Heat gun or propane torch for bubble removal
- Painter's tape and plastic sheeting
- Sandpaper (220, 400, and 600 grit)
- Tack cloth for final cleaning
- Protective gear (gloves, respirator, safety glasses)
The Kleer Kote Epoxy system stands out with its convenient 1:1 mix ratio, eliminating the guesswork common with other systems that require complex ratios.
Step-by-Step Guide to Pouring Perfect Table Top Epoxy
Step 1: Surface Preparation
Proper preparation is crucial for achieving a flawless finish. Start by sanding your surface with 220-grit sandpaper to create adequate adhesion. Remove all dust with a tack cloth, then clean thoroughly with denatured alcohol. Any imperfections, scratches, or contamination will show through the clear epoxy coating.
For wooden surfaces, ensure the moisture content is below 10%. If working on a boat table, check that the wood hasn't absorbed excess humidity during your last outing.
Step 2: Creating a Containment Dam
Use painter's tape around the perimeter of your surface, building up multiple layers to create a dam that's slightly higher than your intended epoxy thickness. This prevents the resin from running off the edges and ensures even coverage across the entire surface.
Step 3: Mixing Your Epoxy Resin Table Top System
Temperature matters significantly when working with epoxy. Ensure your workspace and materials are between 70-75°F for optimal results. Using a digital scale, measure equal parts of resin and hardener - the 1:1 ratio of systems like Kleer Kote makes this straightforward.
Mix thoroughly for 2-3 minutes, scraping the sides and bottom of your container. Under-mixing is one of the most common causes of curing problems, and understanding proper epoxy hardener ratios is essential for success.
Step 4: The Pour
Starting at one end, pour the mixed epoxy in a steady stream across the surface. Work quickly but deliberately, as most table top epoxy systems have a working time of 20-30 minutes. The self-leveling properties will help distribute the material evenly, but you may need to guide it with a brush or spreader to ensure complete coverage.
Step 5: Bubble Removal
Within 10 minutes of pouring, use a heat gun or propane torch to remove surface bubbles. Keep the flame moving and maintain a distance of 6-8 inches to avoid overheating the epoxy. This step is critical for achieving that perfect, glass-like clarity.
Professional Tips for Flawless Results
Temperature control extends beyond the initial pour. Maintain consistent temperature throughout the cure cycle to prevent issues like orange peel texture or incomplete curing. If you're working on a boat, consider the ambient temperature in your marina or storage facility.
For bar top epoxy applications where durability is paramount, consider applying a second thin coat after the first has cured. This provides extra thickness and protection against glasses, bottles, and daily wear.
Timing your project correctly is crucial. Plan for 24-48 hours of cure time before handling, and avoid dusty environments during the cure cycle. Marine environments can be particularly challenging due to salt air and humidity fluctuations.
Troubleshooting Common Issues
Even experienced craftspeople encounter occasional problems. Here's how to address the most common issues:
Bubbles that won't surface: This usually indicates the epoxy is too thick or the temperature is too low. Gentle heating can help bubbles rise to the surface.
Uneven thickness: Poor surface preparation or inadequate containment dams are typically the culprit. Prevention is better than correction in this case.
Cloudy finish: Usually caused by moisture contamination or incompatible materials. Ensure your surface is completely dry and compatible with epoxy systems. For complex projects requiring precise composite work, techniques like vacuum bagging methods can help achieve superior results.
Curing and Final Steps
Resist the temptation to disturb your project during curing. Most quality systems like the Kleer Kote Epoxy will be tack-free within 12 hours and fully cured within 72 hours. Higher temperatures accelerate curing, while cooler conditions extend cure times.
Once fully cured, you can sand out any minor imperfections with 400-grit sandpaper followed by 600-grit for a smooth finish. A final polish will restore the high-gloss appearance. When working with fiberglass reinforcements or repairs, proper cutting techniques ensure clean edges and professional results.
Conclusion
Mastering the art of table top epoxy application opens up countless possibilities for creating beautiful, durable surfaces in your home or marine vessel. With proper preparation, quality materials like professional-grade epoxy systems, and attention to technique, you can achieve results that rival professional installations.
Remember that success with epoxy work comes from patience and preparation. Take time to understand your materials, prepare your workspace properly, and don't rush the process. The investment in doing it right the first time will reward you with a stunning, long-lasting finish that enhances both the beauty and functionality of your surfaces.
Frequently asked questions
How thick can I pour table top epoxy in a single coat?
Table top systems are formulated for thick flood coats, typically 1/8 inch to 1/4 inch per pour, without generating the runaway exotherm that causes cracking or bubbling in deep casting resins. If you need more depth, pour in stages. For a bar top facing daily wear, lay a second thin coat after the first cures for extra thickness and protection.
What temperature should the shop and the resin be when I pour?
Keep your workspace and materials between 70F and 75F (21C to 24C) for proper flow, leveling, and cure. Cold conditions trap bubbles and stretch cure times; if the epoxy is too thick or too cold, bubbles will not surface. Hold that temperature through the whole cure cycle, not just the pour, to avoid orange peel texture and incomplete curing.
How do I get rid of bubbles in the epoxy after pouring?
Within about 10 minutes of pouring, pass a heat gun or propane torch over the surface to break surface bubbles. Keep the flame moving and stay 6 to 8 inches off the epoxy so you do not scorch it. Bubbles that refuse to rise usually mean the resin is too thick or too cold, so gentle warming helps them release.
How long does table top epoxy take to cure before I can use the surface?
Plan on 24 to 48 hours before handling. Quality systems like Kleer Kote are tack-free within roughly 12 hours and fully cured within 72 hours. Higher temperatures speed the cure, cooler conditions slow it. Keep the project undisturbed and out of dusty air the whole time, which matters in marine settings with salt air and shifting humidity.
Why did my clear epoxy finish cure cloudy?
A cloudy finish is usually moisture contamination or incompatible materials. Make sure the surface is completely dry before pouring; on wooden tops the moisture content should be below 10 percent. On a boat table, confirm the wood has not soaked up humidity since your last outing. Sand with 220 grit, remove dust with a tack cloth, and wipe with denatured alcohol before you pour.
Shop the materials in this guide
- Kleer Kote table top epoxy, the crystal-clear 1:1 casting pour.
- liquid pigment sampler, to tint your pour.
- all table top epoxy.
Prev post

How to Mix Polyester Resin: Complete Beginner's Guide for Perfect Results
Updated on 04 April 2026
Next post

Vacuum Bagging Film: Complete Setup Guide for Perfect Composite Results
Updated on 03 April 2026