Fairing Compound: Mixing a Batch That Sands Flat

03 October 2026
A fairing batch has one job: go on at a 1/16 to 1/4 in (1.5 to 6 mm) skim, hold a trowel edge on a vertical panel without sagging, and cut with 80 grit the next morning without loading the paper. Whether it does that comes down to three decisions: which filler goes where, how thick you mix it (by the stick, not the cup markings), and which hardener you run for the shop temperature. Here is how we set up a fairing batch on a hull side or a deck skin.
Which fairing filler for which job
Fairing is not structural. Every filler below exists to make a cured laminate flat and primer-ready, and none of them should be carrying load or bridging a hole. If the low spot is deeper than about 1/4 in (6 mm), or you can see weave through it, that is a glass job first and a fairing job second.
| Filler | What is in it | Where it belongs | How it sands |
|---|---|---|---|
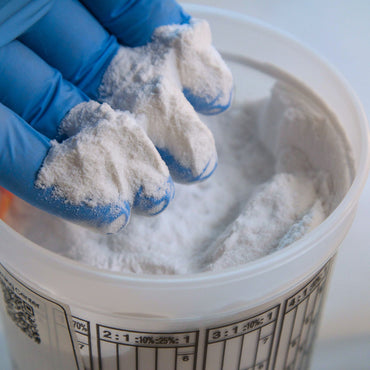
| Boat Suppliers Fairing Compound | Fumed silica, phenolic microballoons and 3M glass bubbles, pre-blended | General fairing over epoxy: hull sides, decks, transoms, repair skims. Skim and fill from one tub | 80 grit cuts it fast; the silica keeps it from slumping on a vertical |
| West System 410 Microlight | Microballoon blend, dark red-brown | Large areas above the waterline where sanding effort is the whole point: topsides, cabin tops, big deck skims | Easiest sanding in the West line, feathers to nothing. Not rated for high heat or high load areas; check the TDS before using it under dark paint in full sun |
| West System 405 Filleting Blend | Brown structural blend | Fillets and glue lines on wood that will be bright finished: stitch-and-glue seams, brightwork joints | Sands to a wood tone that disappears under varnish; more work than 410 because it is denser |
The pre-blended compound is what we reach for on a repair where the fairing covers a mix of ground laminate, filled fastener holes and a skim over new glass. The silica in the blend is what lets it stand 1/4 in thick on a hull side; straight microballoons with no silica sag at that thickness. 410 Microlight is the answer when you have 40 sq ft of topsides to fair and a longboard in your future: it is the lowest-density filler in the West line and it cuts fastest. 405 is a different animal. It is a filleting blend, not a fairing skim, and it earns its place only when the fillet is going to show under varnish.
Mix to the stick, not the ratio on the box
Mix the epoxy first, completely, before any powder goes in. West System 105 Resin with 206 Slow Hardener runs 5:1 by volume (5.19:1 by weight). Stir two full minutes, scrape the sides and bottom, then add powder. Adding filler to half-mixed epoxy is how you get soft spots that never cure and clog the paper.
The consistency you want for fairing is peanut butter: it stands on the mixing stick, holds a trowel edge, and does not slump when you swipe it onto a vertical panel. On a microballoon blend that lands somewhere around two to three parts powder to one part mixed epoxy by volume, but the stick tells you, not the cup. If it slides off the stick, add powder. If it drags and tears behind the trowel, it is too dry; add a little epoxy. Do not add powder once the batch has started to warm up in the pot.
| Consistency | Test | Use |
|---|---|---|
| Ketchup | Runs off the stick in a stream | Fill coats over cloth, sealing bare wood |
| Mayonnaise | Sags off the stick slowly | Bonding, gap filling under a cleat pad |
| Peanut butter | Stands on the stick, holds a trowel edge | Fairing skims and fills, fillets |
Pick the hardener for the shop temperature
A thick fairing batch spread out in a wide tray lasts longer than the pot life numbers suggest, but the hardener still decides when you can sand.
| West System 105 with | Pot life, 100 g at 72°F (22°C) | Cure to solid at 72°F | Lowest working temp |
|---|---|---|---|
| 205 Fast Hardener | 9 to 12 min | 6 to 8 hours | 40°F (4°C) |
| 206 Slow Hardener | 20 to 25 min | 10 to 15 hours | 60°F (16°C) |
In a Florida shop in summer we run 206 for anything bigger than a cup of fairing; 205 in an 85°F (29°C) garage kicks in the tray before you have it spread. Below 60°F switch to 205 and give it the full 8 hours before sanding. Either way, full strength takes 1 to 4 days, so do not throw a longboard at it after two hours and expect it to cut clean.
How much to mix and how much to buy
The math is geometry. A gallon of mixed fairing compound is 231 cu in, which covers about 13 sq ft (1.2 m²) at 1/8 in (3 mm), or about 26 sq ft at a 1/16 in skim, before sanding losses. Plan on taking 30 to 40 percent of a first skim back off with the longboard, because you are cutting the highs down to the lows. Two thin passes with a guide coat between them beat one heavy pass every time. The fairing filler calculator sizes the batch for a given area and depth, and the resin calculator gives you the epoxy to go with it.
For a transom skin or a single repair, a quart of Boat Suppliers Fairing Compound with a pint of mixed 105/206 is the batch. For topsides on a 20 to 25 ft boat, buy the gallon of compound and a 4 lb bag of West System 410 Microlight for the final skim, where the sanding effort matters most. For a stitch-and-glue hull, the fillets get West System 405 Filleting Blend Filler and the fairing over the tape gets the pre-blended compound.
Apply, cure, sand flat
Trowel the batch on with a wide plastic spreader or a notched trowel, working across the low spot and past it. Do not try to finish the surface with the trowel; leave it slightly high and let the longboard find flat. Sand at 80 grit on a longboard in overlapping diagonal strokes, then spray a mist guide coat and skim again only where the guide coat survives. The second pass sands at 120, then 220 before high-build primer. Fairing compound is porous compared to laminate, so once you are flat, roll on two coats of neat epoxy before primer; below the waterline that step is not optional.
Fairing over a defect in the laminate is the mistake we see most on customer boats. Weave print through gelcoat is a laminate problem: on a polyester or vinyl ester layup, a ply of 0.75oz Fiberglass Chopped Strand Mat behind the gelcoat blocks the print, and 1/8 in of filler over the top does not. A depression deeper than 1/4 in gets a ply of 1.5oz Fiberglass Chopped Strand Mat in polyester (or a ply of cloth in epoxy) before any fairing goes on. Sand fairing compound with a P100 respirator, nitrile gloves and eye protection; mixed epoxy is a skin sensitizer and the dust is fine enough to get past a paper mask.
Frequently asked questions
How thick should fairing compound be mixed?
Peanut butter. It should stand on the stick and hold a trowel edge on a vertical panel without slumping. That is roughly two to three parts powder to one part mixed epoxy by volume on a microballoon blend, but judge it by the stick, not the cup. Mix the epoxy fully first, then add powder in stages until it stands up.
How long before I can sand fairing compound?
With West System 105/206 at 72°F, cure to solid is 10 to 15 hours, so sand the next morning. With 205 Fast Hardener it is 6 to 8 hours. Sanding early gums the paper and drags the compound instead of cutting it. In a cold shop add time: below 60°F switch to 205 and wait the full 8 hours.
How thick can I apply fairing compound in one pass?
Hold it to 1/4 in (6 mm) per pass with a silica-bearing blend, and 1/8 in with straight microballoons. Anything deeper than 1/4 in is a glass job: lay a ply of 1.5 oz mat or cloth into the depression first, then fair over it. Two thin passes with a guide coat between them finish flatter than one thick pass.
Can I use fairing compound below the waterline?
Yes, with two rules. Use a blend with fumed silica in it, not straight microballoons, and seal the sanded fairing with at least two coats of neat epoxy before barrier coat or bottom paint. Fairing compound is porous compared to laminate. Keep 410 Microlight above the waterline and out of high-heat areas; West does not rate it for those.
What grit sequence gets fairing compound flat?
80 grit on a longboard to find flat, then a mist guide coat, then a second skim only where the guide coat survives. Cut that at 120, then 220 before high-build primer. Do not start finer than 80 on the first pass; you will chase highs for an hour that 80 grit would have leveled in ten minutes.
What You Need For This Job
- Boat Suppliers Fairing Compound: the pre-blended silica, microballoon and glass bubble powder for skims and fills over epoxy
- West System 410 Microlight: the easiest-sanding final skim for large topside areas
- West System 405 Filleting Blend Filler: brown filleting blend for stitch-and-glue seams that finish bright
- 1.5oz Fiberglass Chopped Strand Mat: fills a depression deeper than 1/4 in before fairing, in polyester or vinyl ester
- 0.75oz Fiberglass Chopped Strand Mat: print-blocking ply behind gelcoat so you are not fairing weave print
Next post

Fiberglass Repair: Picking Materials by Damage Type
Updated on 02 October 2026