Boat Gunwale Repair: Rebuilding a Rotted or Cracked Gunnel

11 October 2026
A boat gunwale fails one of three ways: the fiberglass hull-to-deck flange under the rubrail cracks and starts weeping, the wooden gunnel cap or rub strake rots from the fastener holes inward, or the hollow void behind the gunwale fills with water and the edge goes soft and heavy. Each one has a different fix and none of them is a tube of sealant. The rule that settles it: open it up, dry it out, rebuild with epoxy and glass or new sealed wood, fill any void you cannot glass with 2 lb closed-cell pour foam, and bed every fastener on the way back together.
Which gunwale you have decides the repair
Gunwale and gunnel are the same word: the top edge of the hull where the side meets the deck. On a production fiberglass boat that is a shoebox joint or an inward flange, 2 to 3 in (50 to 75 mm) wide, fastened every 4 to 6 in and covered by a vinyl or aluminum rubrail. On a skiff or a wood boat it is a wooden cap screwed to the sheer. Pull the rubrail or a few cap screws and look before buying anything.
| What you find | Repair | Materials |
|---|---|---|
| Cracked or delaminated fiberglass flange, dry inside | Grind, epoxy fillet, re-glass | Epoxy, 1708 biaxial, 6 oz cloth, fumed silica, fairing compound |
| Rotted wood cap or rub strake | Replace the wood, seal all six sides with epoxy | New stock, epoxy, foam brushes, varnish or paint, bedding sealant |
| Hollow void behind the gunwale, waterlogged | Drain, dry, fill in lifts | 2 lb pour foam, drill for relief holes, epoxy to plug |
| Loose rivets or screws, no structural damage | Re-fasten and re-bed | Oversize fasteners, polyurethane or polysulfide sealant |
Cracked fiberglass gunwale: grind it back and glass it
Stress cracks along the flange mean the joint has been working, usually from a trailer bunk set too wide or fasteners that lost their bite. Sealant on a cracked flange holds for one season; the repair is a secondary bond. Pull the rubrail and grind a 12:1 taper on both faces of the crack with 36 grit on a 4-1/2 in grinder, so a 1/8 in (3 mm) flange gets about 1-1/2 in (38 mm) of taper each side. Wipe with acetone and lay it up with epoxy, not polyester, which bonds poorly to cured laminate. West System 105/206 at 5:1 through the pumps gives a 20 to 25 minute pot life at 72°F (22°C) and is sandable in 10 to 15 hours; 105/205 is the choice below 60°F (16°C). Grinding old laminate calls for a P100 with organic vapor cartridges, nitrile gloves, and eye protection.
Fill the crack with epoxy thickened with fumed silica to a peanut-butter fillet, then lay two plies of 1708 biaxial, staggered 1 in, wrapped around the flange corner, and cap with one ply of 6 oz plain weave for a smooth fairing surface. Roll each ply out; the corner traps air. Once cured, fair with an epoxy and microballoon mix, using a 1-1/4" Stainless Steel Putty Knife to pull the filler into the rubrail channel where a wider knife will not reach, then sand at 80 and 120 grit. The resin calculator gives you the epoxy volume for the 1708 you are laying, usually less than a quart for a 4 ft repair.
Rotted wooden gunnel: replace it, then seal all six sides
Wood gunwales rot from the fastener holes and the end grain, and by the time the cap looks bad the rot is 6 to 12 in past where you can see it. Pull the cap, probe with an awl, and cut back to bright wood plus 6 in. If more than a third of a run is gone, replace the run. White oak, mahogany, or teak; pressure-treated lumber moves too much and will not hold a finish.
Before the new wood goes on, seal every face and end with unthickened epoxy: two coats minimum, three on the end grain, and the inside of every fastener hole with a pipe cleaner. This is where foam brushes earn their place. A 1" Foam Brush - 48 Pack gets epoxy into the fastener holes and the rabbet without flooding it; a 2" Foam Brush - 48 Pack or 3" Foam Brush - 36 Pack lays the flats. Foam does not shed bristles or leave brush marks, and you throw it away after every coat. Recoat while the previous coat is still tacky, or wash the amine blush off with water and scuff at 220 first. Once the epoxy is cured, varnish: three coats gets you through a season, six to eight is a proper build, sanded at 220 between coats. Bed the cap in polyurethane or polysulfide sealant and put every screw through a countersunk hole with a sealant ring under the head; water past a screw head is how the last one rotted.
Waterlogged void behind the gunwale: drain, dry, then pour foam
Many 17 to 24 ft production boats have a hollow between the hull and deck flanges, and some have a rolled gunwale that is a closed box. Rain gets in at the rubrail screws and stays until the edge of the boat weighs 30 lb more per side. Drill 1/4 in drain holes at the low point from inside the boat, not through the outside skin, and let it drain. Then let it dry, which means weeks with a fan, not a weekend; a moisture meter on the laminate or any wood inside should read under 15 percent before you foam. Foam poured into a wet cavity traps the water against the laminate for good.
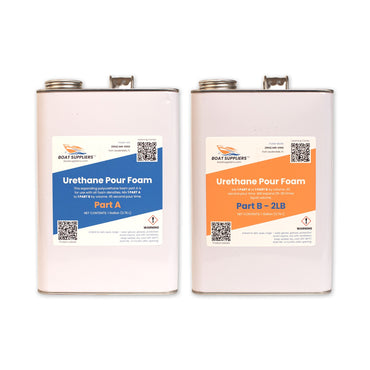
Once it is dry, fill the void with 2 lb density urethane pour foam, the closed-cell marine flotation standard: 1:1 by volume, starts to rise in about 45 seconds, reaches roughly 25 to 30 times its liquid volume in about 5 minutes. That expansion is also the hazard; foam poured in one shot into a closed gunwale can crack the flange or pop the deck joint. Pour in lifts of a cup or two, let each rise and set, and drill a relief hole every 18 in so the foam has somewhere to go. Trim the squeeze-out flush and plug the holes with thickened epoxy.
| 2 lb pour foam | Mix ratio | Cream time | Rise time | Yield (approx) |
|---|---|---|---|---|
| Quart kit (2 x 16 fl oz) | 1:1 by volume | About 45 seconds | About 5 minutes | About 1 cu ft |
| Half gallon kit (2 x 32 fl oz) | 1:1 by volume | About 45 seconds | About 5 minutes | About 2 cu ft |
For one gunwale on a 17 to 20 ft boat, the 2 LB Marine Flotation Pour Foam Kit, Quart (2 x 16 fl oz) covers it. For both sides on a boat 21 ft and up, or a rolled gunwale, buy the 2 LB Marine Flotation Pour Foam Kit, Half Gallon (2 x 32 fl oz). Measure the void first: length in inches times cross-section in square inches, divided by 1,728, is cubic feet. Foam is flotation and a void filler, not a structural repair; a cracked flange still gets glassed.
We did a gunwale on an early-80s Mako where the previous owner had pumped silicone into the rubrail channel every spring for a decade; the water was still in there, the silicone had just kept it from leaving. No silicone anywhere on a gunwale. Nothing will stick to that flange again; rubrail screws go back in with polyurethane or polysulfide.
Frequently asked questions
What is the gunwale on a boat?
The gunwale, pronounced and often spelled gunnel, is the top edge of the hull where the side meets the deck. On a production fiberglass boat it is the 2 to 3 in hull-to-deck flange under the rubrail; on a skiff or wood boat it is the wooden cap along the sheer. It is where rod holders and cleats mount, and where water gets in when fasteners let go.
Can I fix a cracked gunwale with sealant?
No. Sealant in a stress crack holds a season and traps water behind the flange. Grind a 12:1 taper, fillet with epoxy thickened with fumed silica, and lay two plies of 1708 biaxial plus a 6 oz cloth cap. A 4 ft repair uses less than a quart of epoxy and is sandable in 10 to 15 hours at 72°F with West 105/206.
Should I fill my boat gunwale with pour foam?
Only if the void is dry and the flange is sound. 2 lb pour foam adds flotation and stiffness, but poured into a wet cavity it locks the water in, and poured in one shot it can crack the gunwale as it expands 25 to 30 times. Drain, dry for weeks, then pour in lifts with relief holes every 18 in. A quart kit fills about 1 cu ft.
How do I stop water getting into the gunwale?
Water comes in at the rubrail screws and the deck hardware. Pull the rubrail, fill the old holes with thickened epoxy, redrill, and bed every screw in polyurethane or polysulfide sealant with a countersunk ring under the head. Check it once a year by pulling three screws along each side; if the threads come out wet, re-bed that run.
Epoxy or polyester resin for a gunwale repair?
Epoxy. A gunwale repair is entirely a secondary bond to cured laminate, and polyester's secondary bond is a fraction of what epoxy gives on that surface. West System 105/206 at 5:1 gives you a 20 to 25 minute pot life at 72°F; switch to 105/205 below 60°F. Gelcoat or paint over it once fully cured and sanded to 120 grit.
How much pour foam does a gunwale void take?
Length in inches times cross-section in square inches, divided by 1,728, is cubic feet. A 16 ft gunwale with a 2 by 3 in cavity is about 0.67 cu ft per side, so a quart kit (about 1 cu ft) does one side and a half gallon kit (about 2 cu ft) does both. Buy 20 percent over for squeeze-out.
What You Need For This Job
- 2 LB Marine Flotation Pour Foam Kit, Quart (2 x 16 fl oz): fills a dry gunwale void on one side of a boat under 20 ft
- 2 LB Marine Flotation Pour Foam Kit, Half Gallon (2 x 32 fl oz): both sides, or a rolled gunwale cavity
- 1" Foam Brush - 48 Pack: epoxy into fastener holes, rabbets and end grain
- 2" Foam Brush - 48 Pack: epoxy seal coats and varnish on the cap
- 3" Foam Brush - 36 Pack: varnish on wide caps and covering boards
- 1-1/4" Stainless Steel Putty Knife: fairing compound in the rubrail channel
Next post

Teak Oil vs Sealer: Which Finish for Your Brightwork
Updated on 04 October 2026